
To build a custom closet for better storage, start by measuring your space accurately, accounting for baseboards and corners. Gather essential tools like plywood, screws, and a circular saw. Create a mock-up of your design, ensuring it caters to your specific needs. Cut materials precisely for a clean fit, and use wood glue for sturdy assembly. Pre-finish the plywood for a polished look. If you stick around, you'll discover more tips for maximizing your closet's efficiency.
Key Takeaways
- Measure your space accurately, including walls and ceiling height, to ensure a perfect fit for your custom closet.
- Design your closet layout on paper or use digital tools for 3D modeling to visualize the best storage solution.
- Gather materials like plywood, screws, and edge banding, ensuring you have the necessary tools and safety gear for construction.
- Assemble the closet organizer by securely attaching shelves and using wood glue for stability, while keeping your workspace organized.
- Add finishing touches like adjustable shelving, decorative hardware, and a cohesive stain or paint finish to enhance functionality and style.
Planning Your Closet Design
When planning your closet design, the first step is to measure your space accurately. Include the back wall and side walls, and don't forget to account for baseboards and ceiling height. This guarantees your closet system fits perfectly.
Think about your personal storage needs and layout, allowing at least 9 inches between the corners of organizers for easy access. Clear your area by removing existing baseboards and organizers, and use a stud finder to mark stud locations for secure installation.
Consider your storage requirements and ensure 9 inches of space between organizer corners for easy access. Clear the area and locate studs for secure installation.
Next, create a detailed mock-up of your closet organizer with graph paper or design software like SketchUp to visualize your design. This process of mindful organization can significantly reduce stress and improve your overall emotional well-being.
Finally, draft a thorough cut list, including an allowance for 10% extra material for any mistakes.
Essential Tools and Materials
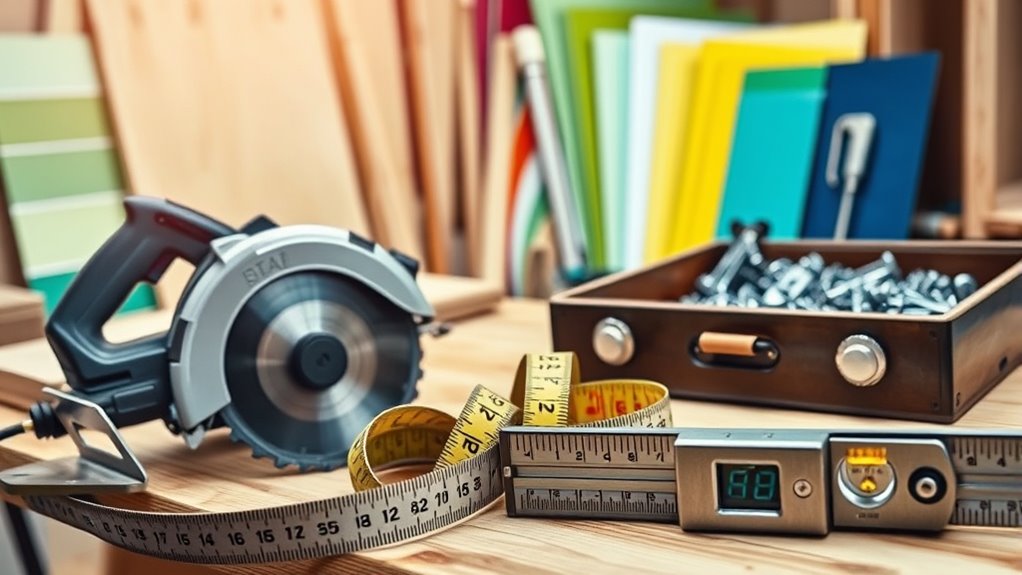
After you've mapped out your closet design, gathering the right tools and materials becomes your next priority.
You'll need about seven sheets of 3/4 maple plywood, cabinet screws, Kreg pocket screws, maple edge banding, and wood glue for construction.
Don't forget your safety gear—gloves, eye protection, and hearing protection are essential.
A circular saw will help you make accurate cuts, and a homemade guide can boost precision. An edge guide with a router is necessary for creating dados.
Use a stud finder to find and mark stud locations in the wall, ensuring secure attachment of your closet organizer.
For assembly, a pneumatic brad nailer speeds up attaching plywood backs, while wood screws and glue secure joints for durability.
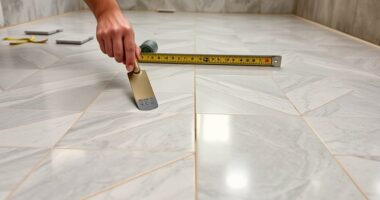
Accurate Measurements for Your Space
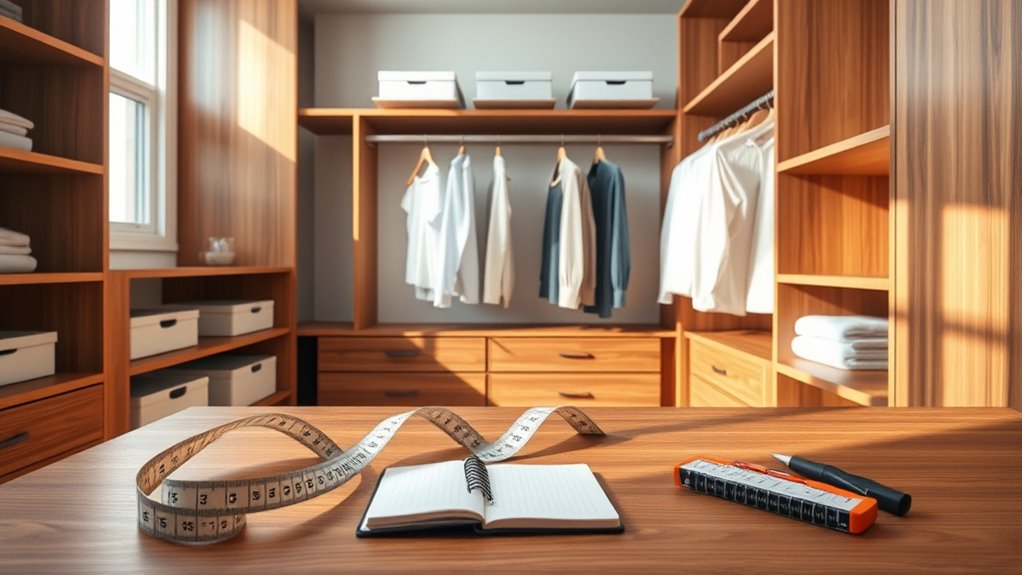
Getting accurate measurements is essential to creating a custom closet that fits perfectly in your space.
You'll need the right tools to guarantee precise sizing, and don't forget to adjust for any wall features that could affect your layout.
Importance of Precise Measurements
Accurate measurements are the cornerstone of building a custom closet that fits your space perfectly. By taking precise measurements of your closet area, including back and side walls, you'll guarantee a proper fit and avoid costly mistakes during assembly. Don't forget to deduct 1 1/2 inches from the back wall measurement for shelf supports, and measure the height for appropriate shelf placements.
| Measurement Type | Considerations |
|---|---|
| Back Wall Measurement | Deduct 1.5 inches for thickness |
| Shelf Height | Guarantee at least 9 inches between corners |
| Leveling | Use a level to check for shims |
| Cut List | Add 10% for waste and mistakes |
Keeping a detailed cut list based on these precise measurements will help you estimate material needs accurately.
Tools for Accurate Sizing
Having the right tools on hand can make a significant difference in achieving accurate measurements for your custom closet.
Start with a few essentials to guarantee precision in your project:
- Tape measure: For exact dimensions of your closet space, including all walls.
- Level: To check for floor unevenness, guaranteeing a straight installation.
- Cut list: Keep a detailed list based on your measurements to minimize waste.
- Pencil: Mark measurements clearly on materials before cutting.
Always double-check your measurements before making any cuts.
Remember to account for wall thickness by deducting 1 ½ inches from the back wall measurement.
With these tools, you'll set yourself up for a successful custom closet build.
Adjusting for Wall Features
When measuring your closet space, it's essential to adjust for any wall features that might impact your design. Start by measuring the back wall and both side walls, deducting 1 1/2 inches for baseboard thickness.
Use a stud finder to locate wall studs, marking their positions for securing your closet organizers. This guarantees they can support heavier items.
When planning shelves, maintain at least 9 inches of space between corners of organizers for easy access and maximum storage efficiency.
Always double-check your measurements before cutting plywood to prevent mistakes.
Finally, consider your ceiling height and overhead features when determining shelf heights, making sure your design is both functional and aesthetically pleasing.
Creating a Mock-Up
To create an effective mock-up of your custom closet, start by visualizing your design on paper or using digital tools like Homestylr or SketchUp.
These tools let you adjust measurements and layout before you commit to construction. Making sure your design fits your space will save you time and headaches later on.
Visualizing Your Design
How do you envision your dream closet? Start by visualizing your design on paper or graph paper, outlining the proportions and layout. You can also use tools like Homestylr or SketchUp for a 3D model of your closet organizer, which makes planning easier.
Keep these essential points in mind:
- Measure your closet space, considering baseboards and ceiling height.
- Create a mock-up with adjustable shelves, ensuring 9 inches between corners.
- Include built-in drawers or a desk area to enhance usability.
- Tailor the design to fit your specific storage needs.
Tools for Mock-Up
Creating a mock-up is essential for bringing your custom closet vision to life. Start with simple paper and pencil sketches to brainstorm ideas and establish a basic design concept.
Then, utilize graph paper to create a scaled layout, ensuring your dimensions are precise. For more detailed visualization, employ digital tools for mock-up like Homestylr or SketchUp. These platforms allow you to experiment with different configurations and styles before you start building.
Make sure to account for specific measurements, such as shelf heights and widths, to optimize your design. Additionally, digital mock-up tools help you assess how various materials and finishes will look together, aiding in your decision-making process about aesthetics and functionality.
Adjusting Measurements Accurately
Accurate measurements are essential when finalizing your custom closet design. Start by creating a mock-up using graph paper or design software like SketchUp. Visualizing dimensions helps you avoid costly mistakes.
Here are some key steps to take into account:
- Measure the closet height from floor to ceiling, subtracting 1.5 inches for wall thickness.
- Allow at least 9 inches between the corners of organizers for easy access.
- Use a stud finder to mark stud locations for secure shelf installation.
- Draft a precise cut list based on your mock-up, allowing for 10% extra material for errors.
Cutting Techniques and Safety Tips

When it comes to cutting materials for your custom closet, precision and safety are key. Use a homemade circular saw guide secured with double-sided tape to guarantee straight cuts, giving you accurate dimensions.
Always wear safety gear—gloves, eye protection, and hearing protection—to safeguard against potential hazards.
Wearing safety gear—gloves, eye protection, and hearing protection—is essential for protecting yourself from potential hazards.
For creating dados for shelving, employ an edge guide with a router to achieve precise grooves that support your shelves effectively.
Before assembly, don't forget to pre-finish your plywood with stain or paint to protect edges and enhance aesthetics.
Finally, maintain a clean and organized workspace while cutting, as this helps prevent accidents and guarantees all cuts are clean and accurate for a proper fit during assembly.
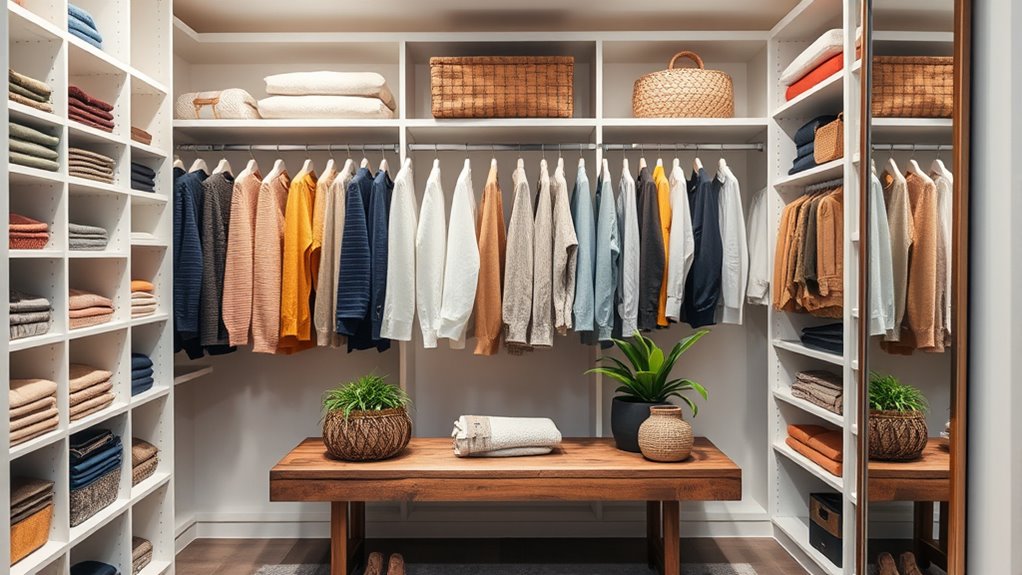
Assembling Your Closet Organizer
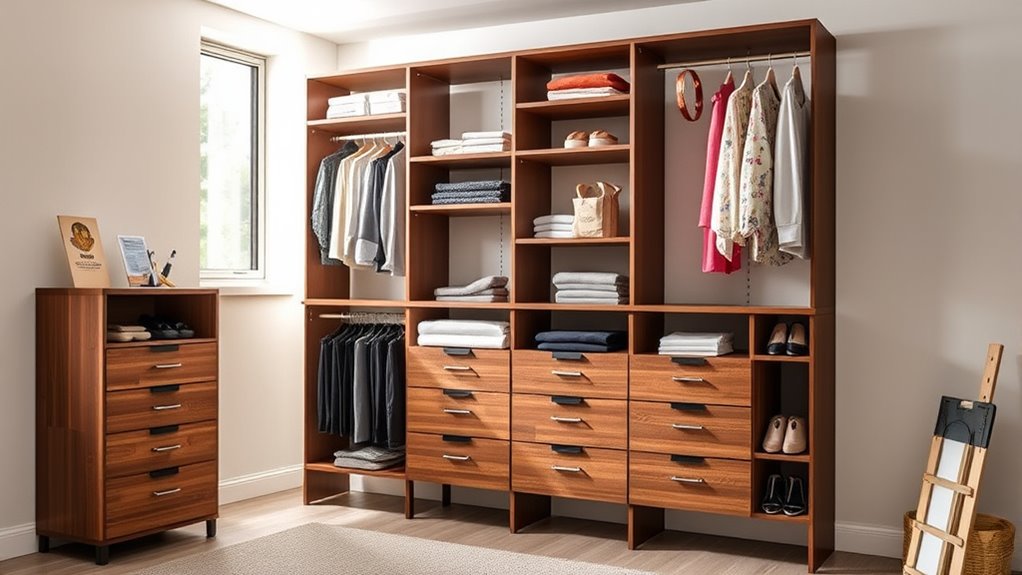
Assembling your closet organizer is an exciting step that brings your vision to life. Start by securely attaching the bottom shelf to the side panels using wood glue in dado joints and screws.
Before assembly, don't forget to apply edge banding to all exposed edges for a polished finish. Use a stud finder to locate stud positions and mark them for shelf support pieces, guaranteeing stability.
Follow these key steps for your DIY closet organizer:
- Position top shelf supports 84 inches above the floor.
- Set bottom shelf supports at 76 inches.
- Align and space shelves evenly.
- Confirm shelf height accommodates your items.
Incorporating effective wall organization can enhance both functionality and aesthetics in your closet space.
With these steps, you'll create a functional and stylish storage solution!
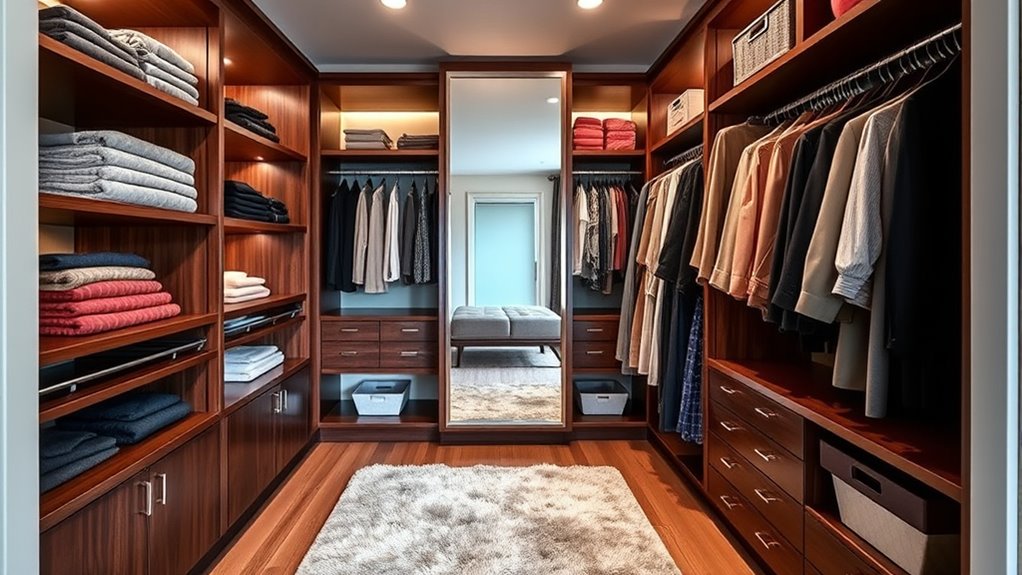
Finishing Touches and Aesthetics
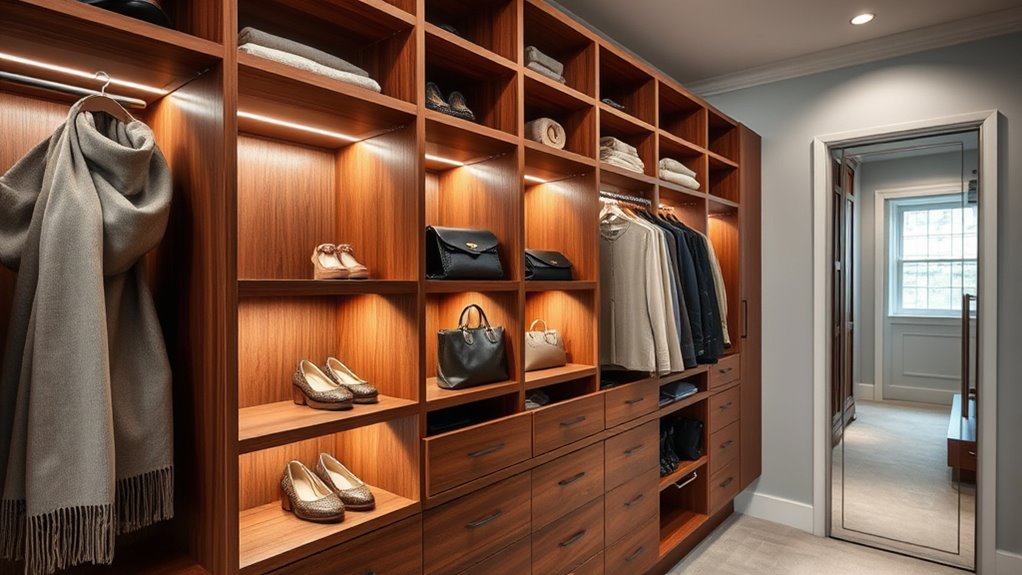
To elevate your custom closet's overall appeal, finishing touches and aesthetics play an essential role.
Start by applying edge banding to any exposed plywood edges with a hot iron, giving your closet organizer a polished look. Choose a stain or paint finish that complements your home's decor, and remember to pre-finish the wood before assembly for a seamless appearance.
Applying edge banding and choosing a complementary finish elevates your closet organizer's look for a polished, seamless appearance.
Use veneer strips to cover raw edges or mistakes, enhancing the aesthetic while protecting the plywood. Incorporate adjustable shelving and drawer fronts with a continuous grain appearance for a clean, cohesive design.
Finally, consider adding decorative hardware or knobs to drawer fronts, blending functionality with a touch of personal style that truly reflects your taste. Additionally, ensure that you regularly trim cat's nails to maintain the integrity of your new closet as cats may be curious about your storage solutions.
Installing Your Closet System

Having put the finishing touches on your custom closet's design, it's time to focus on the installation process. Start by measuring your closet space accurately, ensuring you leave enough room for the closet rod and other organizers. Use a stud finder to mark stud positions, securing your system to these for stability.
Next, follow these steps:
- Install shelf supports at 84 inches and 76 inches high, adjusting as needed.
- Assemble the organizer by attaching the bottom shelf to side panels with wood glue and screws.
- Use a pneumatic brad nailer to attach the plywood back for added support.
- Finally, hang your closet rod, ensuring it's level and securely fastened.
With these steps, your custom closet will be both functional and sturdy! Additionally, ensuring color accuracy in your design elements can enhance the overall aesthetic of the space.
Cost Analysis of DIY vs. Pre-Made Options

When considering the cost of building a custom closet, you'll notice a significant difference in material costs between DIY and pre-made options.
While a DIY approach might take you longer, the investment of time can lead to a tailored design that fits your specific needs.
Let's break down the material costs and labor time to see what options work best for your project.
Material Costs Comparison
Building a custom closet can be a cost-effective choice, especially when you compare material costs for DIY projects versus pre-made options.
Creating your closet from scratch can cost around $200 in materials, while pre-built systems typically run about $450. That's a savings of $250!
By opting for DIY, you can also personalize your design to fit your storage needs. Here are some common materials you'll need:
- 3/4 maple plywood
- Cabinet screws
- Edge banding
- Wood glue
This material costs comparison shows that with careful budgeting and sourcing, you can achieve a higher quality and customized closet at a lower price than ready-made solutions.
Plus, you get the satisfaction of building it yourself! Additionally, implementing effective preventive maintenance can further enhance the longevity of your custom closet and its components.
Labor Time Analysis
A labor time analysis reveals significant differences between DIY custom closet projects and pre-made options.
While building a custom closet yourself can save you about $250, it requires a substantial time investment—around 12 to 16 hours depending on your skill level.
On the other hand, pre-made systems typically take just over 3 hours to assemble, making them an attractive choice for those who value speed.
However, DIY projects allow for greater customization, enabling you to create a closet tailored specifically to your needs.
This personalized approach can outweigh the convenience of pre-made options, especially if you're willing to invest the time for a more functional design.
Ultimately, consider what matters most to you: time or personalization.
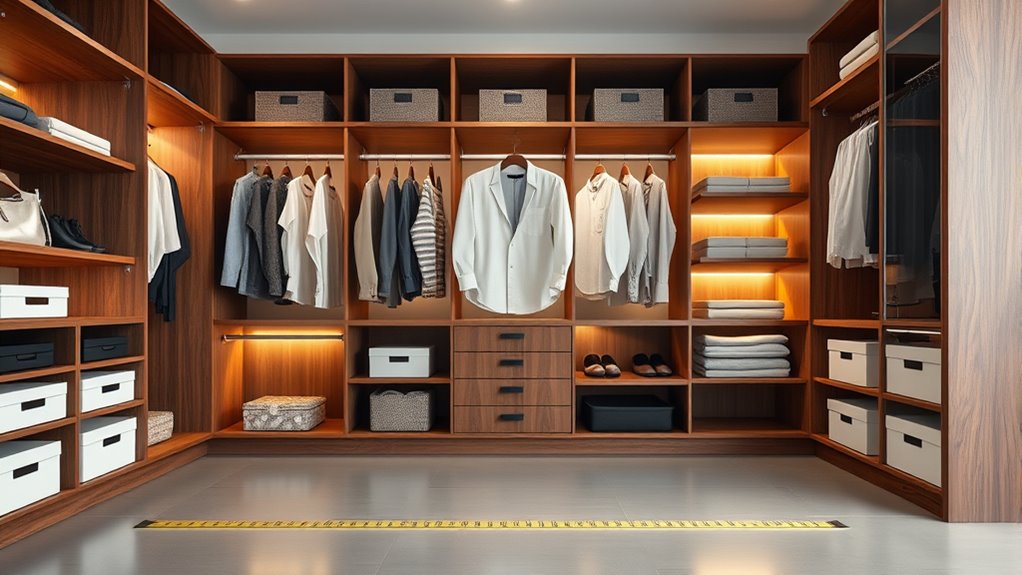
Maximizing Storage and Organization
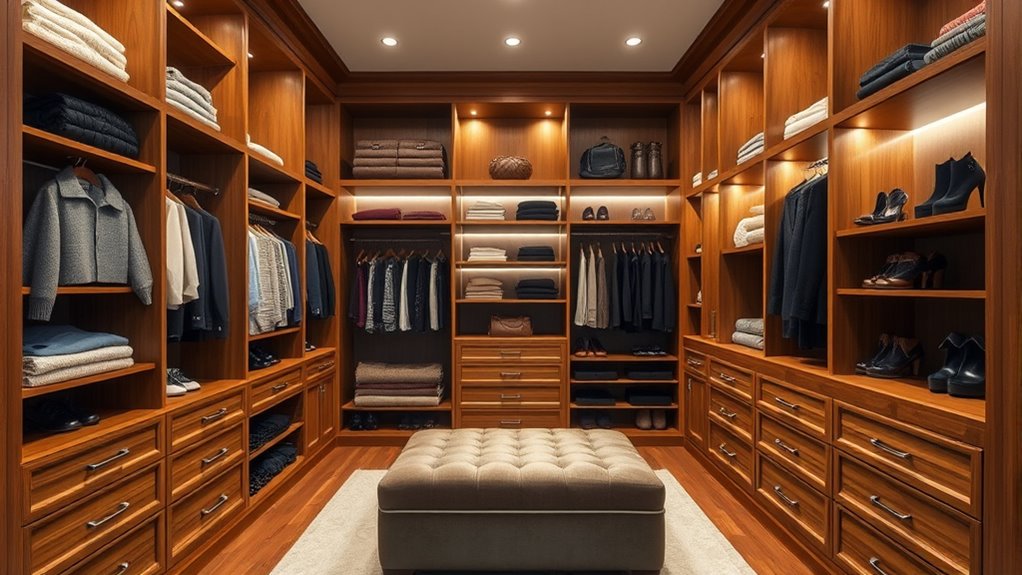
Maximizing storage and organization in your custom closet starts with accurate measurements.
Make sure to account for baseboards and ceiling height to design a space that works for you. Incorporating adjustable shelves is key, as they allow for flexible organization of items of varying heights.
Account for baseboards and ceiling height to create a functional space, and use adjustable shelves for versatile organization.
Here are some tips to enhance your closet:
- Use 3/4-inch plywood for shelving for durability and a polished look.
- Plan for at least 9 inches between corners of organizers to prevent overcrowding.
- Consider a DIY build, which can offer more storage options than pre-made systems while saving you money.
- Keep frequently used items at eye level for easy access.
Frequently Asked Questions
Is It Cheaper to Build Your Own Closet?
Yes, it's cheaper to build your own closet.
You'll save around $250 by opting for a DIY project, which typically costs about $200 compared to $450 for a pre-built system.
You'll find that materials like plywood and screws are more affordable, allowing you to create a customized design that fits your needs.
Plus, you'll enjoy the satisfaction of crafting a personalized storage solution without breaking the bank.
How Do I Get More Storage Out of My Closet?
It's like trying to fit a square peg in a round hole when your closet's overflowing.
To get more storage, start by maximizing vertical space with adjustable shelving. Incorporate multi-tiered hanging rods for different clothing lengths, and add built-in drawers for smaller items.
Use slim, non-slip hangers to save space and keep everything organized. Finally, consider a modular design that lets you customize as your storage needs change.
You'll find it easier to maintain order!
What Is the Best Material for Custom Closets?
When choosing the best material for custom closets, consider your needs.
If you want durability and strength, 3/4-inch plywood is a great choice, as it supports heavy loads well.
For a budget-friendly option, MDF offers a smooth finish but isn't as strong.
If aesthetics and longevity are priorities, solid wood adds beauty but comes at a higher price.
Particleboard is economical, but keep in mind it may not handle heavy items as well.
What Is the Best DIY Closet System?
When you think about a DIY closet system, consider the contrast between pre-built options and your personalized design.
You can create a unique, efficient space that suits your needs while saving money. Using sturdy 3/4-inch plywood and adjustable shelves, you'll craft a functional solution that adapts to various items.
Plus, incorporating quality hardware enhances both durability and style, turning your closet into an organized haven that reflects your personal taste.
Conclusion
Building your own custom closet can transform your space and boost organization. Did you know that a well-organized closet can save you up to 30 minutes a day searching for items? By planning your design, using the right tools, and following safety tips, you'll create a functional space tailored just for you. With a little time and effort, you'll enjoy a clutter-free environment that not only looks great but also enhances your daily routine.