
You can maximize light for your photography in just 30 seconds using the hand trick. Hold your palm at arm’s length to assess the surrounding light and check for any unwanted color casts. Position your subjects at the edge of shade, angled away from the sun for even illumination. Don’t forget to experiment with different hand angles to discover the most flattering light. Keep exploring to uncover more effective lighting techniques for your photos.
Key Takeaways
- Use the hand trick to quickly evaluate light quality and identify color casts affecting your photographs.
- Position subjects at the edge of shade, facing away from the sun for even illumination and minimal color distortion.
- On cloudy days, the hand trick helps find soft, even light, enhancing the quality of your images.
- For indoor shots, assess natural window light by turning off artificial lights and adjusting your position for the best results.
- Share your experiences with the hand trick in photography groups to learn and improve lighting techniques quickly.

How can you quickly assess the quality of natural light for your photography? It’s easier than you think. Using a simple technique called the hand trick, you can evaluate light quality in just 30 seconds. Hold your palm at arm’s length and observe the light around you. This method helps you identify color casts that could affect your shots.
If you’re serious about your photography business, mastering this quick assessment can be a big deal, especially when you’re working under varying lighting conditions. Understanding sound quality is essential in photography just as it is in music production, as both rely on optimal conditions for the best results.
Position subjects at the edge of shade while facing away from the sun for optimal lighting. This technique minimizes unwanted color casts, allowing your subject to be illuminated evenly. You’ll discover that experimenting with different angles of your hand reveals changes in light intensity and shadow. In about half a minute, you’ll find the most flattering light direction for your subjects.
This trick can save you from trial and error, enabling you to focus more on capturing great moments.
On cloudy days, don’t fret; the hand trick still works wonders. Even when the sun’s direction is obscured, you can use this method to discern the best light available. The soft, even light of a cloudy day can enhance your photographs, and knowing how to find it quickly is crucial.
Just remember to keep your palm out and adjust as needed. You’ll be amazed at how this small adjustment can transform your images.
When shooting indoors, it’s just as vital to assess natural window light. Turn off any artificial lights and use the same hand trick. Move your palm closer to and further from the window to determine the ideal positioning for your subject.
This simple adjustment can enhance the quality of your indoor shots dramatically.
If you’re part of a photography Facebook group, share your experiences with this technique. You’ll likely find many others who’ve benefited from the hand trick. It’s a quick, effective way to maximize your lighting without needing extensive setups.
In Story: The Behind, Episode 312 (BONUS) [TRAINING], understanding natural light quality is emphasized. Don’t underestimate the importance of these quick assessments; they can elevate your photography to new heights.
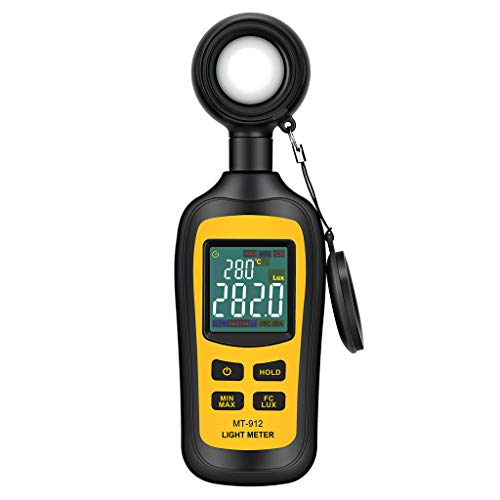
Light Meter Digital Illuminance Meter Handheld Ambient Temperature Measurer, Range up to 200,000 Lux, Luxmeter with 4 Digit Color LCD Screen
- Luminosity Range: 0 to 200,000 Lux
- Temperature Measurement: Ambient temperature measurement
- High Accuracy: ±3% or ±4% accuracy
As an affiliate, we earn on qualifying purchases.
As an affiliate, we earn on qualifying purchases.
Frequently Asked Questions
What Is Night Mode on Iphone for 30 Seconds?
Night Mode on your iPhone helps you capture stunning low-light photos by automatically adjusting exposure times.
When you’re in a dark environment, it activates and shows you how long to hold the shot for optimal clarity.
You can also tweak the exposure time manually, giving you creative control over how light and motion appear in your images.
This feature works across all camera lenses, ensuring versatility in any low-light situation you encounter.
How to Maximize Lighting?
To maximize lighting for your photography, start by assessing the natural light quality using your hand trick—hold your palm at arm’s length to check for color casts.
Position your subjects at the edge of shade for softer, even light, reducing harsh shadows. On cloudy days, find the most flattering direction of light.
Indoors, rely on natural window light and adjust your distance to achieve the best exposure for your subject.
Practice in various settings for optimal results.
How Do You Increase the Amount of Light?
Imagine you’re at a dimly lit concert, trying to capture the energy.
To increase the amount of light, you can start by opening your camera’s aperture to a lower f-stop, which lets in more light.
You could also boost the ISO setting to make your sensor more sensitive, but keep an eye on noise.
If needed, use a slower shutter speed or add external lighting to enhance your shots further.
Experiment and have fun!
How Do I Let More Light In?
To let more light in, position your subject near windows or outdoor areas with plenty of natural light.
You can also use larger apertures on your camera to increase light intake.
Adjusting your ISO settings will help your camera sensor capture more light, but watch out for graininess.
Additionally, try using reflectors or white surfaces to bounce light onto your subject, enhancing illumination without needing extra light sources.
Conclusion
In just 30 seconds, you can transform your space into a beacon of light. By opening curtains, switching on lamps, and reflecting sunlight off surfaces, you create a warm glow that dances like fireflies on a summer night. Embrace these quick changes, and watch your environment brighten, lifting your spirits and energizing your day. Just a little effort goes a long way, turning shadows into light and dull moments into vibrant ones. You’ve got this!