Adding crown molding can instantly elevate your room’s elegance by creating a polished, sophisticated look that enhances architecture and decor. Choose a style that complements your space, whether sleek and modern or ornate and traditional. Proper installation—measuring carefully, using the right tools, and finishing neatly—ensures a professional finish. When you match your moldings to your decor, you deepen the room’s character. Discover tips to make your installation flawless and truly transform your space.
Key Takeaways
- Choose crown molding styles that complement your room’s decor, from sleek modern to ornate traditional.
- Measure walls accurately and select proportionate molding based on ceiling height and room size.
- Use precise cutting tools like a miter saw and proper installation techniques for a seamless fit.
- Fill, sand, and finish molding with primer and paint for a polished, professional appearance.
- Properly matched and installed crown molding instantly elevates your room’s elegance and overall aesthetic.
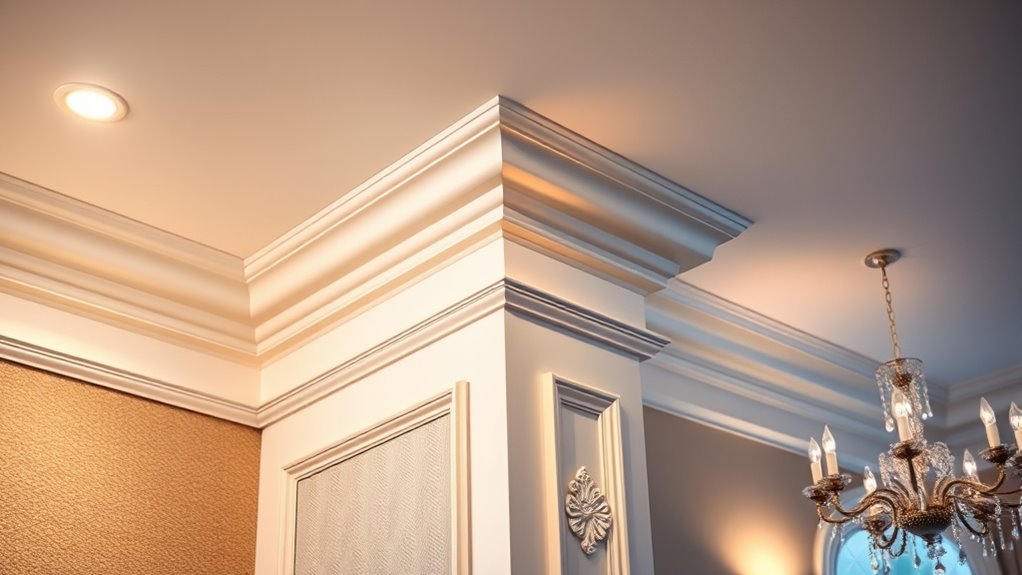
Are you ready to elevate your space with a touch of elegance? Adding crown molding is a fantastic way to transform any room, giving it a polished and sophisticated look. When it comes to style options, you’ll find a wide range of profiles, from simple and modern to ornate and traditional. Whether you prefer clean lines or intricate designs, choosing the right style helps set the tone of your space. Think about the overall decor and architecture of your room—sleek, minimal moldings suit contemporary interiors, while detailed, decorative styles complement classic or vintage themes. The variety ensures you can find a design that perfectly matches your vision.
Choose crown molding styles that match your decor, from sleek modern to ornate traditional designs.
Once you’ve selected the style, it’s time to think about installation techniques. Proper installation is key to achieving a professional finish, so take your time to prepare. First, measure your walls accurately, marking where the crown molding will sit. Use a miter saw to make precise angled cuts, typically at 45 degrees, to create seamless corners. This step is vital for a tight fit and a clean appearance. For uneven walls or ceilings, you might need to make slight adjustments or use shims to guarantee the molding sits flush. When attaching the molding, use finishing nails or a nail gun, and be sure to sink the nails just below the surface to make filling and painting easier later on.
Be mindful of the ceiling height and wall dimensions—these influence the size and proportion of the molding you select. For taller ceilings, thicker or more elaborate profiles can add grandeur, while smaller profiles work better in modest spaces. Remember to use a level frequently during installation to keep the molding straight, especially when working on longer runs. Filling nail holes with wood filler or caulk, followed by sanding, creates a smooth surface ready for painting or staining. Primer and paint or stain the molding after installation to match or complement your existing decor, enhancing its visual appeal.
Adding crown molding isn’t just about aesthetics; it’s about creating a seamless transition between the wall and ceiling, which adds depth and character to your room. With the right style options and proper installation techniques, you can achieve a professional look that elevates your space effortlessly. Whether you’re a seasoned DIYer or trying it for the first time, patience and attention to detail will ensure your crown molding looks stunning. Additionally, understanding passive voice detection can help improve the clarity and professionalism of your instructions. In the end, the effort pays off—your room will feel more refined, inviting, and truly your own.
Frequently Asked Questions
What Are the Best Types of Wood for Crown Molding?
You should choose hardwoods like oak, maple, or cherry for crown molding because they offer attractive wood grain patterns and durability. Oak is especially popular due to its moisture resistance, making it ideal for areas with humidity. Maple provides a smooth finish and strength, while cherry adds warmth and elegance. These woods guarantee your crown molding remains beautiful and intact over time, enhancing your room’s overall look.
How Do I Match Crown Molding Style With My Room Decor?
You match crown molding style with your room decor by considering your existing decor coordination and style integration. If your space has traditional elements, opt for ornate designs or detailed profiles. For modern decor, choose sleek, simple styles with clean lines. Think about the room’s color palette and furniture to guarantee the molding complements rather than clashes. This thoughtful approach creates a seamless, cohesive look that elevates your room’s overall elegance.
Can Crown Molding Be Installed in High-Ceiling Rooms?
Yes, you can install crown molding in high-ceiling rooms. To make it look proportional, you should choose a molding scale that complements the ceiling height. Larger, more elaborate moldings work best because they fill the space and add visual interest. Measure your ceiling height carefully, and select a molding style that enhances the room’s grandeur without overwhelming it. Proper installation guarantees a polished, elegant look.
What Tools Are Essential for DIY Crown Molding Installation?
To install crown molding yourself, you’ll need essential tools like a saw, measuring tape, miter box, and a level. Focus on accurate measuring techniques to make certain a perfect fit, and always follow safety precautions like wearing eye protection and handling sharp tools carefully. A pencil helps mark cut lines, while a nail gun or hammer secures the molding. These tools and tips make your DIY project smoother and safer.
How Do I Paint or Finish Crown Molding for a Seamless Look?
Think of your crown molding as the frame of a masterpiece—you want it flawless. To achieve a seamless look, use smooth painting techniques like brushing or rolling with high-quality paint, and apply thin, even coats. Sand lightly between coats for a silky finish. The finishing touches, like caulking gaps and carefully taping edges, will hide imperfections and make your molding blend beautifully, turning your room into a work of art.
Conclusion
Adding crown molding transforms your space into something truly regal, like a modern castle. With a little effort, you’re channeling the craftsmanship of great artisans and turning your room into a masterpiece. Think of it as the finishing touch in a symphony—subtle yet powerful. So, go ahead, elevate your home’s elegance and let your space whisper timeless sophistication, much like the grandeur of a palace awaiting its next chapter.