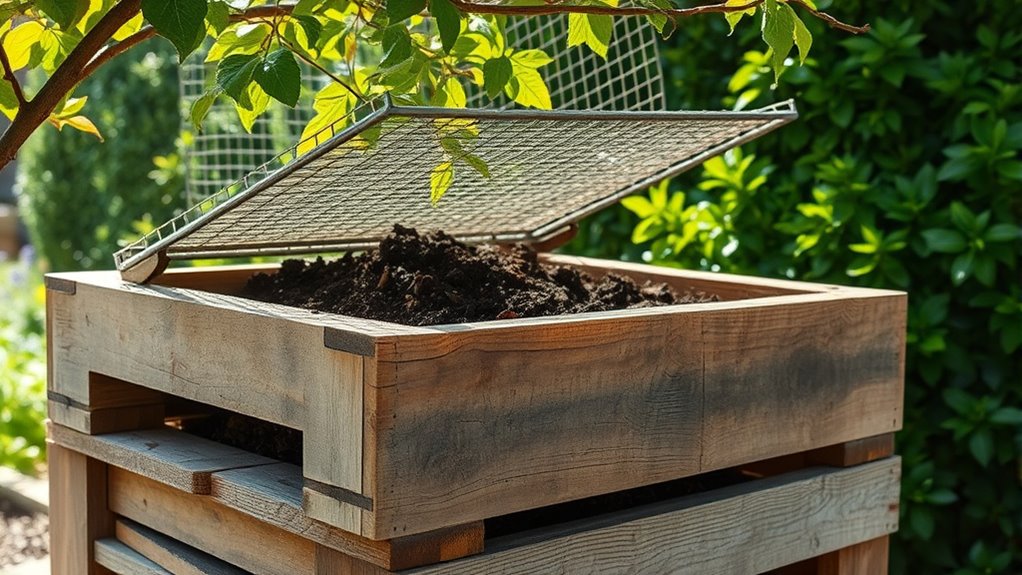

To build a DIY compost bin, choose weather-resistant materials like wooden pallets, plastic bins, or wire mesh. If using wood, leave gaps between pallets for ventilation, and drill holes in plastic bins for airflow and drainage. Make certain your bin has a size suitable for your space and a design that allows easy turning and layering of green and brown materials. Keep the compost moist and aerated, and you’ll discover simple ways to create nutrient-rich soil—just continue to explore the steps involved.
Key Takeaways
- Choose durable, weather-resistant materials like wooden pallets, plastic bins, or wire mesh for construction.
- Determine the appropriate size based on available space and composting needs, considering multi-compartment designs for continuous use.
- Assemble the bin with proper ventilation by leaving gaps between pallets or drilling holes in plastic containers.
- Ensure good drainage and airflow to facilitate composting, using materials that promote aeration and moisture control.
- Maintain proper layering of greens and browns, and regularly turn the compost to accelerate decomposition and compost quality.

Creating your own compost bin is an easy and eco-friendly way to turn kitchen scraps and yard waste into nutrient-rich soil for your garden. Not only does composting benefits your plants by improving soil health, but it also reduces the amount of waste sent to landfills, making it an environmentally responsible choice. When starting your DIY compost bin, selecting the right materials is essential to ensure efficient decomposition and durability. You’ll want to choose materials that are sturdy, weather-resistant, and safe for composting. Common options include wooden pallets, plastic bins, or wire mesh containers. Wooden pallets are affordable and allow good airflow, which helps your compost break down faster. Plastic bins, especially those with lids and aeration vents, are convenient, easy to clean, and keep pests out. Wire mesh or hardware cloth can be used to construct a simple, ventilated bin that encourages airflow, vital for aerobic composting.
As you select your materials, think about how much space you have and how much compost you plan to produce. If you’re limited on space, a compact plastic bin or a vertical compost tumbler might suit your needs. For larger gardens, a multi-compartment wooden bin can handle bigger quantities and allow you to rotate compost for continuous use. Whichever materials you choose, make sure they’re durable enough to withstand weather conditions and won’t rust or degrade quickly over time. You might also consider using recycled or upcycled materials to make your project more sustainable. Incorporating proper aeration techniques can further enhance the efficiency of your composting process.
Once you’ve gathered your materials, you’ll want to plan your bin’s design to promote proper airflow and drainage. For example, if you’re using pallets, leave gaps between slats to enhance ventilation. For plastic bins, drill small holes around the sides and bottom to allow air to circulate and excess moisture to escape. Incorporating materials selection with your design guarantees that your composting process remains efficient and hassle-free. Remember, the key to successful composting benefits is maintaining a balanced mix of greens (nitrogen-rich materials like vegetable scraps) and browns (carbon-rich materials such as leaves or shredded paper). Good materials selection combined with proper layering and regular turning will help you create healthy compost faster.
Frequently Asked Questions
How Long Does It Take for Compost to Fully Decompose?
You might wonder how long compost takes to fully decompose. Typically, the decomposition timeline varies based on materials, temperature, and moisture, but it usually takes about 3 to 6 months for compost to reach maturity. During this period, you’ll notice the compost darkens and becomes crumbly. With proper aeration and balance of greens and browns, you’ll speed up the process and enjoy rich, ready-to-use compost sooner.
Can I Add Meat or Dairy to My Compost Bin?
Imagine inviting a steak and cheese platter into your compost party—sounds delightful, right? Well, not quite. You shouldn’t add meat composting or dairy disposal to your DIY compost bin. These items attract pests, cause odors, and slow down decomposition. Stick to veggie scraps and yard waste. Keep it simple, smell-free, and pest-proof. Your compost will thank you with rich, healthy soil—minus the unwanted animal guests!
What Is the Ideal Size for a DIY Compost Bin?
When choosing bin dimensions, aim for a size that fits your space and compost volume needs. A bin around 3x3x3 feet provides enough room for proper aeration and decomposition, typically handling about 1 to 2 cubic yards of compost. You want a size that’s manageable yet large enough to maintain heat and moisture. Adjust the dimensions based on your available space and the amount of organic waste you generate regularly.
How Often Should I Turn or Aerate My Compost?
Imagine a bubbling stew, constantly stirred for even cooking. That’s your compost, needing regular attention. Your turning schedule depends on material moisture and temperature, but generally, turn or aerate every 1-2 weeks. Use aeration techniques like flipping with a pitchfork or stirring with a garden fork. This keeps oxygen flowing, speeds up decomposition, and prevents odor. Regular turning guarantees your compost breaks down efficiently and stays healthy.
How Do I Prevent Pests From Accessing the Compost?
To prevent pests from accessing your compost, guarantee you use a pest-proof lid that tightly seals the bin. Adding an underground barrier around the base also keeps pests like rodents out by blocking their tunnels. Keep food scraps buried within the compost pile and avoid adding meat or dairy, which attract pests. Regularly turning your compost helps maintain proper aeration and reduces odors that draw pests, keeping your compost pest-free.
Conclusion
Building your own compost bin is a simple, eco-friendly way to reduce waste and enrich your garden. Did you know that composting can cut your kitchen waste by up to 30%? By following these easy steps, you not only help the environment but also create nutrient-rich soil for your plants. Get started today—your garden will thank you, and you’ll enjoy the satisfaction of turning waste into something truly valuable.