
To fix a leaky faucet, start by shutting off the water supply and carefully disassembling the handle to access internal parts like washers, O-rings, or cartridges. Clean or soak the parts in vinegar to remove mineral buildup, and replace any worn or damaged components. Reassemble everything tightly but avoid over-tightening, then turn the water back on to check for leaks. If you want detailed steps, there’s more to learn to guarantee a proper fix.
Key Takeaways
- Identify the leak source by inspecting faucet components and material type for targeted repair.
- Turn off water supply and remove the handle carefully to access internal parts like washers or cartridges.
- Clean or soak worn parts in vinegar or descaler to remove mineral buildup and prevent leaks.
- Replace damaged washers, O-rings, or cartridges with compatible parts to ensure a proper seal.
- Reassemble the faucet carefully, tighten all connections without over-tightening, then test for leaks.
A leaky faucet can be both annoying and costly, but fixing it is often a simple task you can do yourself. When tackling a leak, you first need to identify the cause, which usually involves inspecting the faucet components. One important aspect to contemplate is the faucet material, as different materials like brass, stainless steel, or plastic require specific approaches during repairs. For example, brass faucets tend to be more durable and may need special tools or techniques to avoid damaging the surface, whereas plastic parts might be more flexible but less resistant to wear.
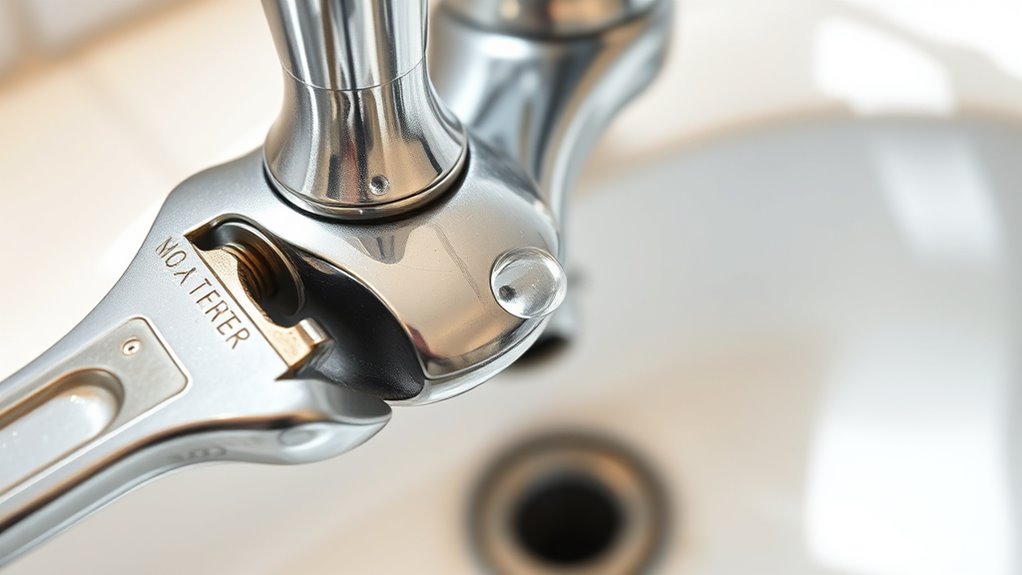
Before beginning any repair, shut off the water supply to prevent further leakage and water wastage. Next, cover the drain opening to avoid losing small parts down the drain during disassembly. Once the water is off, remove the handle of the faucet, which often involves loosening a screw or retaining clip. Be cautious of the faucet’s material here — some metals may be prone to scratching or corrosion, so use appropriate tools and avoid excessive force. With the handle removed, you’ll be able to access the cartridge, washer, or O-ring that’s causing the leak.
Turn off water, remove handle carefully, watch for metal sensitivity and avoid excessive force.
When replacing internal parts, think about the watering techniques you’ll use to ensure proper installation. For example, some repairs require soaking or cleaning components to remove mineral buildup, especially in areas with hard water. Clean all parts thoroughly before reassembling to prevent future leaks. Also, check the faucet material considerations during reassembly; some materials may require specific lubricants or sealants compatible with their composition. Using the wrong lubricant can cause damage or reduce the lifespan of your repair.
If you notice mineral buildup or corrosion, it’s a good idea to soak the parts in vinegar or a commercial descaler before reinstallation. This not only prolongs the life of your faucet but also ensures a tight seal, reducing the chance of future leaks. When putting everything back together, tighten all screws and nuts carefully, paying attention to the material considerations—over-tightening can crack plastic parts or strip metal threads. Turn the water back on slowly and observe if the leak persists.
Lastly, pay attention to watering techniques during your maintenance routine to avoid unnecessary damage. Use gentle, controlled movements when tightening components, and avoid applying excessive force. Proper handling of your faucet’s materials and thoughtful repair techniques will help you fix leaks efficiently and extend the lifespan of your fixture. With patience and care, you can restore your faucet to leak-free operation without calling a plumber.
Frequently Asked Questions
Can I Fix a Leaky Faucet Without Turning off the Water Supply?
Imagine water droplets dancing on your faucet’s surface, reminding you of the importance of water conservation. You might wonder if you can fix a leaky faucet without shutting off the water supply. While some minor faucet maintenance tips suggest attempting repairs with the water on, it’s risky and can cause water damage. For safe, effective repairs, always turn off the water supply first to prevent messes and guarantee proper fixing.
What Tools Are Necessary for Fixing a Leaky Faucet?
To fix a leaky faucet, you’ll need some essential plumber tools like an adjustable wrench, a screwdriver, and pliers. A repair kit, which usually includes replacement washers, O-rings, and seals, makes the process easier. These tools help you disassemble the faucet and replace worn parts. Make sure to turn off the water supply before starting. Having the right plumber tools and a repair kit guarantees a smooth, effective repair.
How Long Does It Typically Take to Repair a Leaky Faucet?
The duration estimate for repairing a leaky faucet varies depending on the problem’s complexity. Typically, the repair time ranges from 30 minutes to an hour if you have the right tools and basic plumbing knowledge. More complicated issues might take longer, especially if you need to replace parts or access difficult areas. Stay patient, follow instructions carefully, and you’ll find that most repairs can be completed efficiently within a reasonable time frame.
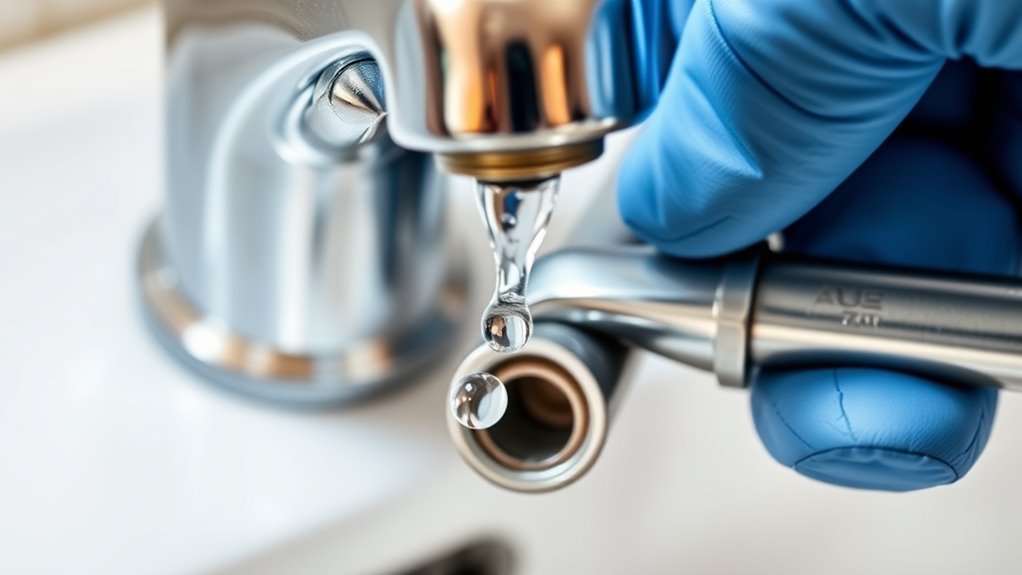
Are There Any Safety Precautions to Consider During Repair?
Did you know that nearly 20% of household accidents happen during DIY repairs? When fixing a leaky faucet, safety is key. Always wear personal protective equipment like gloves and eye protection. Remember to turn off the water supply first, and avoid electrical safety hazards by keeping tools away from electrical outlets. Taking these precautions helps prevent injuries, ensuring your repair is safe and successful.
When Should I Call a Professional Plumber Instead of Fixing It Myself?
You should call a professional plumber if you’re facing emergency repairs or if the leak keeps recurring despite your efforts. Sometimes, the issue is too complex or hidden, risking further damage or water waste. If you’re unsure about your skills or notice signs like corrosion or frequent leaks, it’s safer to obtain expert help. This prevents potential water damage and ensures the repair is done correctly the first time.
Conclusion
To fix a leaky faucet, you need to identify the cause, gather the right tools, and replace the faulty parts. To stop the drip, to save water, and to avoid damage, you must act quickly, follow the steps carefully, and stay patient. Remember, fixing a leak isn’t just about stopping the noise—it’s about saving water, preventing damage, and restoring peace. Take control, stay confident, and enjoy a leak-free faucet again.