
To upgrade your closet with built-in shelves, start by evaluating your available space and measuring dimensions. Choose durable materials like ¾ PureBond plywood and 1 x 3 common boards for support. Follow a step-by-step installation process, ensuring proper wall anchoring. Incorporate adjustable shelves for flexibility and add drawer units for smaller items. Don’t forget about lighting for visibility! With these strategies, you’ll enjoy a well-organized closet that showcases your belongings beautifully. Learn more about maximizing your closet’s potential!
Key Takeaways
- Measure your closet dimensions and inventory belongings to design a tailored shelving system that maximizes storage efficiency.
- Use durable materials like ¾ PureBond plywood and 1 x 3 common boards for strong, sustainable built-in shelves.
- Install adjustable shelves and hanging rods to accommodate varying item sizes and changing family needs.
- Incorporate drawer units for organized storage of small items and consider soft-close mechanisms for ease of use.
- Finish with quality paint and trim, ensuring a polished look, and establish a regular cleaning schedule to maintain organization.
Assessing Your Closet Space
To kick off your closet upgrade, start by measuring its dimensions—height, width, and depth. This step’s essential for identifying the closet space available for your new storage solutions.
Next, take inventory of your belongings to see what you need to store. This assessment guides you in designing an adjustable shelving system tailored to your items.
Take stock of your items to create a custom shelving solution that perfectly fits your storage needs.
Evaluate the current shelving system for weaknesses; maybe it can’t hold heavier items or isn’t accessible.
Consider the layout of your closet, paying attention to door positions and awkward angles that could impact functionality.
Finally, assess the wall structure for stud placement and any necessary repairs to guarantee a solid foundation for your new built-in shelves.
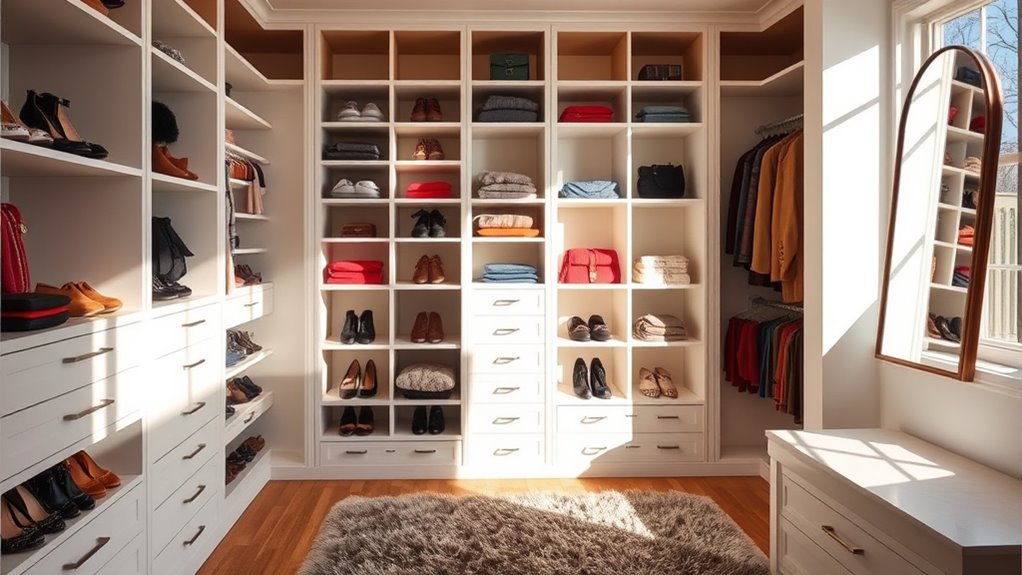
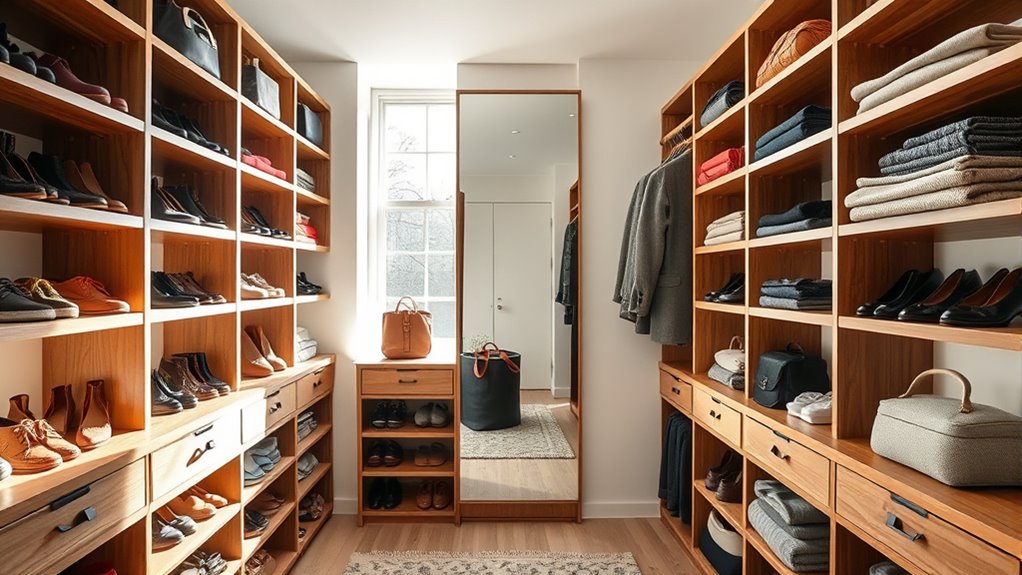
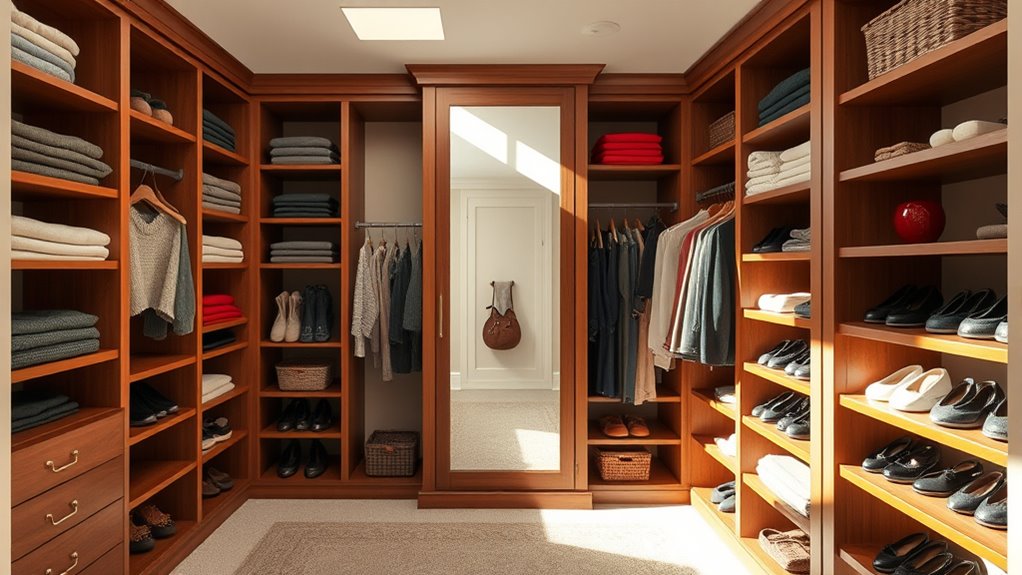
Designing Your Built-In Shelves
When you design your built-in shelves, keep in mind the specific dimensions of your closet space to maximize storage efficiency. Adjust the heights of the shelves for easy access, accommodating various item sizes. Incorporate adjustable hanging rods to meet the changing needs of your family, ensuring functionality for both adults and children. Use cleats made from 1 x 3 common boards, secured with wood screws, to support your shelves effectively.
Here’s a simple layout to contemplate:
| Shelf Height | Purpose | Adjustable Rod Height |
|---|---|---|
| 12 inches | Shoes/Small Items | N/A |
| 24 inches | Handbags/Accessories | 48 inches |
| 36 inches | Folded Clothes | 60 inches |
| 48 inches | Long Dresses | N/A |
| 60 inches | Hats/Storage Bins | 36 inches |
Finishing touches like paint and caulking will enhance durability and appearance.
Materials Needed for the Project

After designing your built-in shelves for ideal functionality, it’s time to gather the materials that will bring your vision to life.
Start with ¾ PureBond plywood, which is formaldehyde-free and sustainably sourced for durability. You’ll also need 1 x 3 common boards to create cleats that support the shelves, along with 1 x 2 primed common boards for trim to enhance your DIY closet’s aesthetics.
For assembly, use 1 ¼-inch pocket screws to guarantee a strong construction. An 18-Gauge Brad Nailer with 1 ¼-inch nails will help you attach the shelves to the cleats.
Don’t forget wood filler for covering nail holes, sandpaper for smoothing surfaces, and quality paint like Scuff Defense Behr for a clean finish.
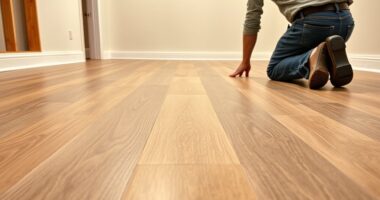
Step-by-Step Installation Process
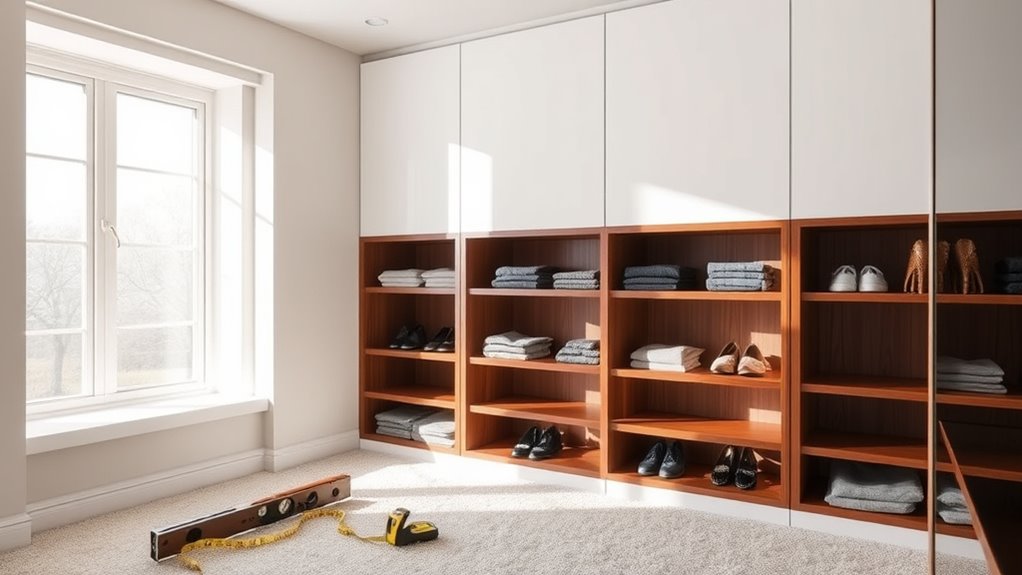
Installing your built-in shelves can be a rewarding project that transforms your closet space. Start by removing any existing wire shelving, then repair wall damage with spackle and paint the walls for a fresh look.
Measure and mark the heights for your shelves, ensuring all supports are level to prevent wobbliness. Use sturdy wall supports anchored into studs for stability, securing the shelves with pocket screws at the corners for added strength.
Assemble your shelf units by drilling shelf pin holes and applying wood glue with pocket screws. Position the units and secure them in place.
Finally, add trim, fill nail holes with wood filler, sand surfaces, and apply paint for a polished finish. You’ve successfully completed your DIY installation!
Adding Drawer Units for Small Items
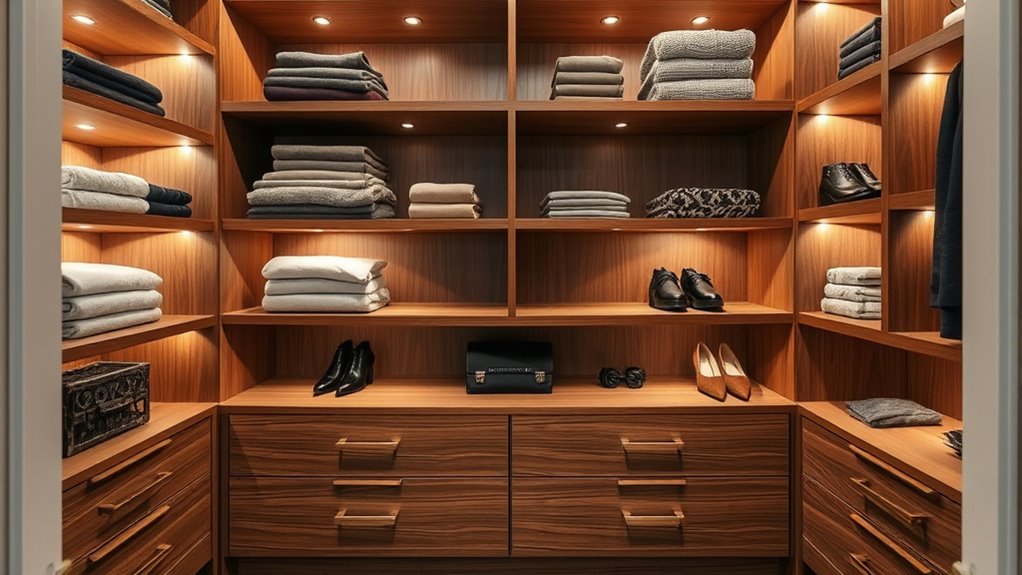
Adding drawer units can greatly enhance your closet’s organization by providing dedicated spaces for small items. These units maximize storage efficiency, allowing you to neatly store accessories, undergarments, and other small items without clutter.
Opt for drawer units with varying depths to accommodate different types of items, ensuring everything has its place. Choose high-quality materials like plywood or MDF for durability and aesthetic appeal, preventing sagging under weight.
Installing drawer units at a comfortable height improves accessibility, making it easy to reach in and grab what you need without straining. For an added touch of luxury, consider soft-close drawer mechanisms for a quieter, refined experience that elevates your closet’s overall quality. Incorporating natural materials in your drawer unit design can further enhance both durability and aesthetic appeal.
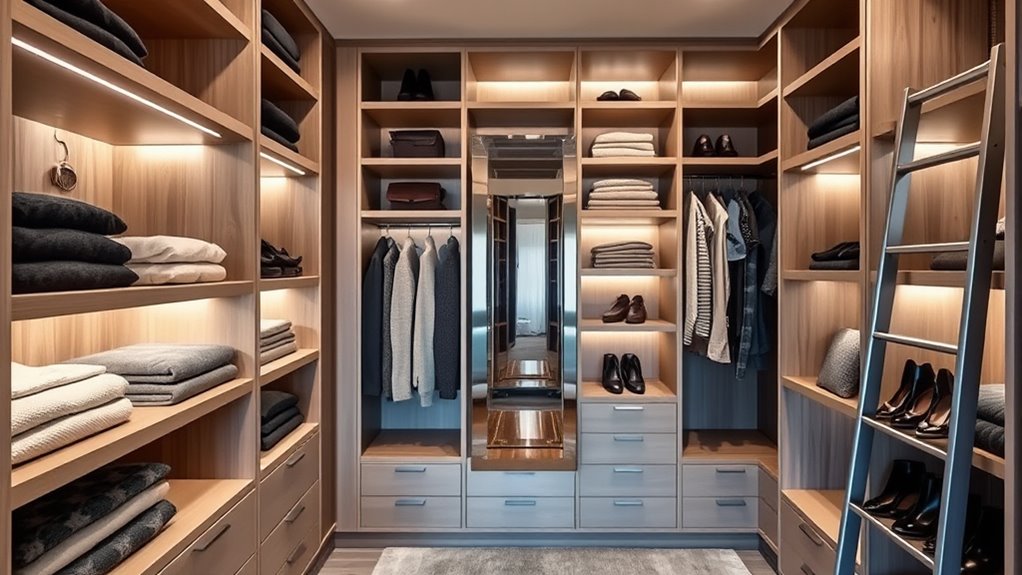
Maximizing Vertical Space With Adjustable Shelves
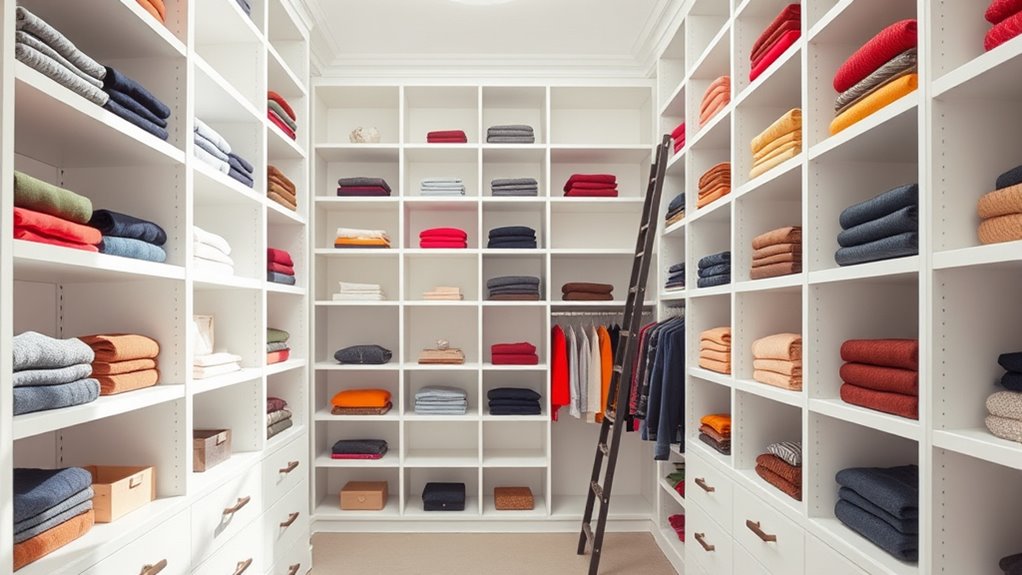
Adjustable shelves are a game-changer for maximizing vertical space in your closet.
With the right installation tips, you can create a flexible storage solution that adapts to your needs, whether it’s for shoes, bags, or folded garments. Regular maintenance of your closet can help ensure that the shelves remain sturdy and extend their lifespan, making your organization efforts more effective.
Let’s explore how to make the most of these shelves for an organized and efficient closet.
Benefits of Adjustable Shelves
When you want to maximize vertical space in your closet, incorporating adjustable shelves offers a flexible solution that meets your changing storage needs.
These shelves allow for customization, enabling you to adjust heights based on what you need to store. This flexibility not only increases your storage capacity but also guarantees you can organize items effectively, accommodating everything from seasonal clothing to larger pieces.
Plus, adjustable shelves enhance accessibility by letting you position items at ideal heights, minimizing the need to stretch or bend.
Ultimately, they promote better organization, creating a visually appealing space that reflects your personal style while remaining practical and functional for everyday use. Additionally, utilizing vertical storage solutions is essential for freeing up floor space and maximizing your closet’s overall efficiency.
Tips for Installation Success
Maximizing vertical space in your closet isn’t just about having adjustable shelves; it’s also about how you install them. Start by using a stud finder to locate wall studs, ensuring your shelving supports are securely anchored. This step is vital for maintaining the weight capacity needed for heavier items without sagging.
When positioning your adjustable shelves, leave 12 to 15 inches of vertical space between them. This creates room for baskets, shoes, or folded clothes. Additionally, consider incorporating adjustable hanging rods at different heights to make the most of your vertical space, accommodating both long and short garments. For durability, use ¾-inch plywood for your shelves, allowing for a versatile and sturdy storage solution that enhances installation success. Incorporating natural materials can also add a warm, rustic touch to your closet design.
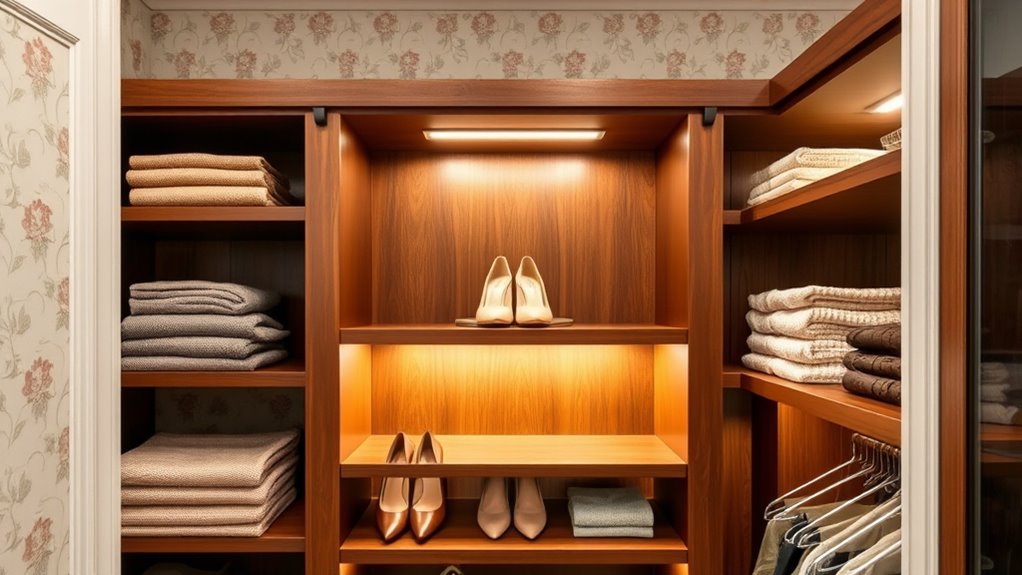
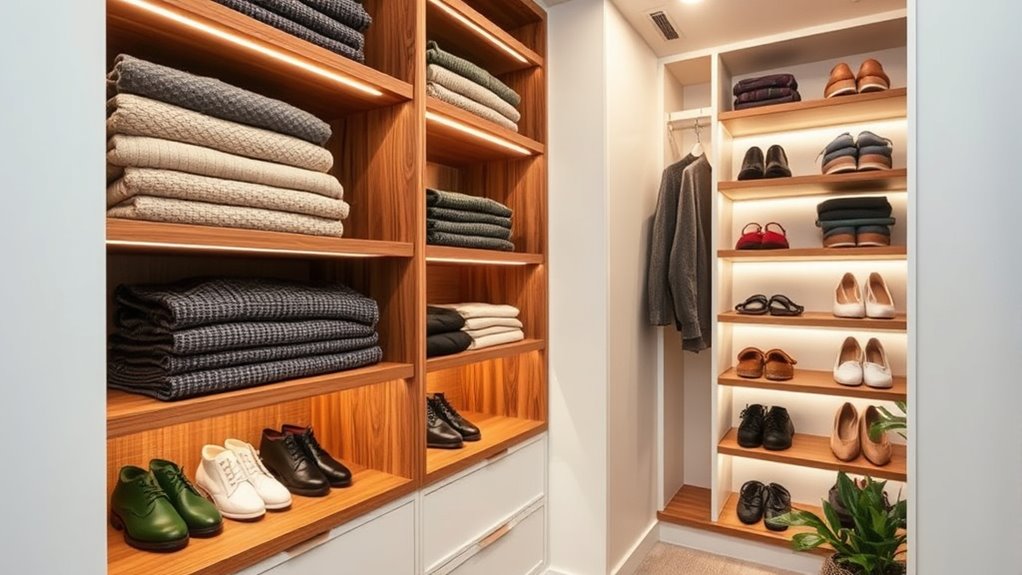
Incorporating Lighting for Enhanced Visibility
To enhance visibility in your closet, consider incorporating lighting solutions that not only illuminate but also elevate the overall aesthetic.
Installing LED strip lights or puck lights can greatly improve visibility, making it easier to find items on your built-in shelves, especially in dim spaces. Motion-activated lights are a convenient choice, turning on automatically when you open the closet door, ensuring instant illumination.
Incorporating LED strip lights or motion-activated lighting instantly enhances visibility in your closet, making it easier to locate your items.
You might also want to explore adjustable lighting options, like track lighting, which lets you direct light exactly where it’s needed. Properly placed lighting prevents shadows in corners and on shelves, increasing safety while maneuvering your closet.
Finally, choosing lights with a color temperature around 3000K creates a warm ambiance, showcasing your clothing and accessories beautifully. Consider also the benefits of HEPA filtration in maintaining air quality, which can enhance your closet environment by reducing allergens and odors.
Final Touches for a Professional Finish
Achieving a professional finish in your closet renovation is essential for both aesthetics and functionality. Start with the final touches by filling all nail holes and gaps with wood filler, then sand the surfaces smooth to eliminate imperfections.
Use caulk to seal edges and joints between the shelves and walls, ensuring a clean look that prevents dust buildup. Next, apply two coats of high-quality paint, like SW Swiss Coffee, allowing sufficient drying time between each coat for durability and appeal.
Don’t forget to install decorative trim, such as cove molding, around the shelves to integrate them elegantly with the room’s decor. Finally, make sure all shelves are level and secure to prevent sagging and create a refined storage solution.
Maintaining Your New Closet Organization
To keep your closet organized, set a regular cleaning schedule to dust shelves and check for any damaged items.
You should also perform a seasonal inventory check, sorting through your belongings to verify everything’s in its right place.
This routine not only maintains order but also helps you stay aware of what you have and what you might need.
Regular Cleaning Schedule
A regular cleaning schedule is essential for maintaining your newly organized closet. Set aside at least 15 minutes each week to declutter and guarantee everything goes back to its designated place. This small commitment helps you stay organized and prevents clutter from taking over your entire closet.
Every three months, implement a seasonal review to evaluate your clothes and items—donate or discard anything you haven’t used in that timeframe. Use clear storage cubes for smaller items, and make it part of your cleaning schedule to check and reorganize these bins regularly.
Additionally, plan an in-depth closet cleanout twice a year, aligning with seasonal changes to assess your needs and adjust your built-in shelves accordingly.
Seasonal Inventory Check
As seasons change, conducting a seasonal inventory check becomes essential for maintaining your closet’s organization.
Start by evaluating your clothing and accessories, guaranteeing everything’s organized by type and frequency of use. Utilize storage bins for off-season items, labeling them clearly to keep your closet system functional and clutter-free.
Rotate your wardrobe by placing current season clothing at eye level and storing off-season garments on higher or lower shelves for easy access.
During your inventory check, examine the condition of your items, donating or discarding those you no longer wear.
Scheduling these checks at the beginning of each season establishes a routine that keeps your closet organized and guarantees you always have what you need at your fingertips.
Frequently Asked Questions
How Do You Turn a Closet Into Built in Shelves?
To turn a closet into built-in shelves, start by emptying it and removing any old shelving.
Repair any wall damage, then measure your space accurately. Use painter’s tape to visualize your layout before choosing durable materials like ¾ inch plywood.
Install cleats into studs for support, assemble the shelves with pocket holes and screws, and level everything.
Finally, add trim for a polished look, testing the load capacity as needed.
How Do I Add Shelves to an Existing Closet?
To add shelves to your existing closet, start by emptying it out completely.
Remove any old shelving and fix any wall damage.
Measure your closet’s dimensions and mark where you want the new shelves.
Use sturdy materials like plywood and secure supports into wall studs.
Install brackets or cleats, ensuring they’re level.
Finally, finish your shelves with trim and paint to match your style, creating a functional and attractive storage space.
Do Closet Built Ins Add Value?
Absolutely, built-in shelves can add value like icing on a cake.
When you enhance your closet with these customized solutions, you’re not just improving functionality; you’re appealing to potential buyers.
Many homebuyers prioritize storage space, and well-designed built-ins can make your home stand out in a competitive market.
Plus, they often yield a return on investment of 50-75%, making them a smart choice for increasing your home’s overall value.
How Much Does It Cost to Build Shelves in a Closet?
Building shelves in your closet can cost anywhere from $100 to $1,500, depending on materials and design complexity.
If you opt for MDF, expect to pay about $15 to $30 per sheet, while higher-quality plywood ranges from $40 to $80.
Don’t forget additional hardware costs, which can add another $50 to $100.
If you’re going the DIY route, plan for 5 to 10 hours of work to complete the project.
Conclusion
Upgrading your closet with built-in shelves might seem intimidating, but it’s easier than you think! You don’t need to be a DIY expert; even a beginner can achieve stunning results with the right guidance. Imagine transforming your cluttered space into an organized haven that not only looks great but also makes finding your favorite outfits a breeze. So, why wait? Immerse yourself in your closet project and enjoy the satisfaction of a beautifully functional space tailored just for you!