To install a smart doorbell yourself, first turn off your power at the breaker to stay safe. Remove your old doorbell and connect the wires to the new device, making sure they match the wiring diagrams. Mount the doorbell securely on the wall, then turn the power back on. Follow the manufacturer’s instructions to connect it to your Wi-Fi network and complete setup using the app. For detailed steps, keep exploring how to guarantee a flawless installation.
Key Takeaways
- Turn off power at the breaker, remove the old doorbell, and compare wiring for compatibility.
- Connect the new doorbell wires securely, following wiring diagrams and using wire strippers if needed.
- Mount the doorbell onto the bracket, ensuring it is level and properly secured.
- Turn the power back on, then follow the manufacturer’s instructions to connect to Wi-Fi via smartphone app.
- Test the doorbell’s video, notifications, and adjust the camera angle for optimal coverage.
Installing a smart doorbell is a straightforward process that can enhance your home security and convenience. Whether you’re tech-savvy or a beginner, taking the DIY route saves you money and gives you a sense of accomplishment. Before you start, gather all the necessary tools—drill, screwdriver, level, wire strippers, and possibly a voltage tester. Most smart doorbells come with detailed instructions, but supplementing these with online video tutorials can make the process even smoother. Watching someone else install a smart doorbell helps clarify steps that might seem complicated, especially when it comes to wiring. It’s advisable to review wiring diagrams beforehand; these diagrams show how your existing wiring connects to the doorbell, guaranteeing you understand the setup before making any changes.
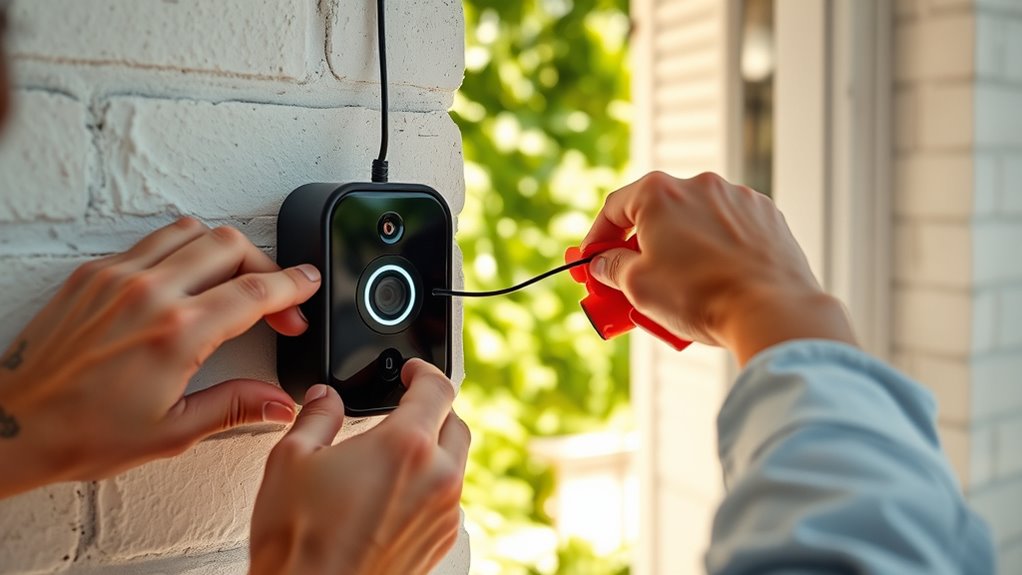
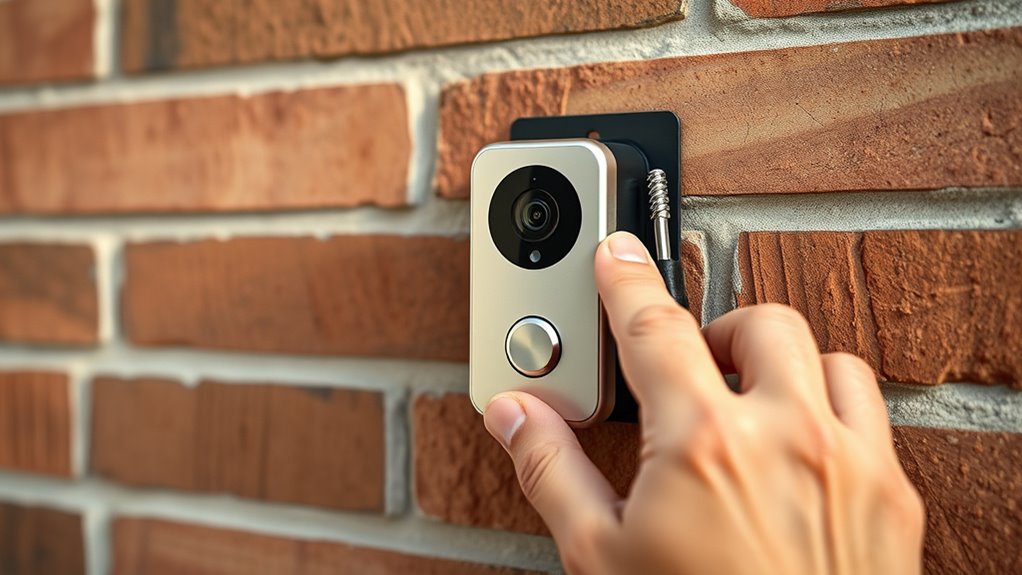
Begin by turning off the power at the breaker to avoid any electrical hazards. Remove your existing doorbell by unscrewing it from the wall and disconnecting the wires. Keep the wires accessible so you can compare with the wiring diagrams provided in the installation manual or available online. Many smart doorbells are designed to work with existing wiring, making installation easier. If your current wiring setup differs, you might need a power transformer or a chime connector, which are often included or available as add-ons. Carefully follow the wiring diagrams to connect the new doorbell wires correctly, guaranteeing secure connections using wire strippers if necessary. Understanding the wire compatibility ensures proper functioning and safety.
Once wired, attach the mounting bracket to the wall, making sure it’s level. This step is vital for a clean, professional look and proper camera alignment. Before securing everything permanently, double-check all connections and verify there’s power running through the wires with a voltage tester. Then, mount the smart doorbell onto the bracket, ensuring it clicks into place securely. Turn the power back on at the breaker and follow the manufacturer’s setup instructions, which often involve connecting the device to your Wi-Fi network using a smartphone app. For clarity, many manufacturers provide helpful video tutorials that walk you through the setup process step-by-step.
After setup, test the doorbell by pressing the button to see if it rings inside and if the video feed activates on your device. Adjust the camera angle if needed, and test the app notifications to make certain you’ll be alerted to visitors. Remember, taking your time to follow wiring diagrams precisely and consulting video tutorials can prevent common mistakes. With patience and attention to detail, you can successfully install your smart doorbell yourself, boosting your home’s security and adding a modern touch to your entryway.
Frequently Asked Questions
Can I Install a Smart Doorbell Without Existing Wiring?
Yes, you can install a smart doorbell without existing wiring by choosing battery-powered options or wireless doorbell options. These models operate on rechargeable or replaceable batteries, so you don’t need to mess with wiring. Simply mount the doorbell where you want, connect it to your Wi-Fi, and you’re all set. This makes installation quick and easy, especially if your home doesn’t have existing doorbell wiring.
What Smartphone Apps Are Compatible With Different Smart Doorbells?
You’ll want to check the app compatibility of your smart doorbell to guarantee seamless device integration. Most popular brands like Ring, Nest, and Arlo offer dedicated apps compatible with both Android and iOS. These apps let you view live video, receive alerts, and customize settings easily. Before purchasing, verify the app compatibility with your smartphone to make setup smooth, and confirm that it supports your preferred device ecosystem for ideal device integration.
How Do I Troubleshoot Wi-Fi Connectivity Issues?
Imagine your smart doorbell keeps disconnecting; it’s frustrating, right? To troubleshoot Wi-Fi connectivity issues, first check the Wi-Fi signal strength near your doorbell. If it’s weak, consider relocating your router to a central, open spot to improve coverage. You might also restart your router or update firmware. Ensuring the router isn’t too far away and has a strong signal helps keep your smart doorbell connected seamlessly.
Is Professional Installation Necessary for Certain Models?
Some smart doorbell models do require professional setup, especially if they involve complex wiring or integration with existing home systems. You might need expert assistance to guarantee everything functions correctly and safely. For simpler, wireless models, DIY installation is usually enough. However, if you’re unsure or uncomfortable with electrical work, it’s best to seek professional installation to avoid potential issues and ensure maximum performance.
How Do I Update the Firmware on My Smart Doorbell?
Imagine your smart doorbell as a vigilant guardian, always ready to serve. To keep it sharp, you need to update its firmware—think of it as giving your guardian a fresh set of eyes. Check the app or device settings for firmware updates, guaranteeing software compatibility. Tap ‘Update’ if available, and let the process finish. Regular updates ensure your doorbell stays secure, responsive, and ready to protect your home.
Conclusion
Now that you’ve installed your smart doorbell, you’re all set to boost your home’s security and stay connected. Remember, a stitch in time saves nine—taking the time to set it up properly guarantees peace of mind. Keep your device updated and check the app regularly. With a little effort today, you’re making your home safer tomorrow. So, don’t put off what you can do now; your smarter, more secure home is just a few steps away.