To install luxury vinyl plank flooring affordably, start by preparing a clean, flat subfloor and measure carefully for a smooth layout. Use basic tools like a utility knife, spacers, and a mallet to secure planks snugly without extra costs. Maintain a consistent ¼ inch gap around the edges for expansion. Once installed, finish with baseboards for a polished look. If you want step-by-step guidance, keep going to master each part of the process.
Key Takeaways
- Prepare a clean, flat subfloor and measure carefully to minimize waste and ensure a smooth installation.
- Use basic tools like a utility knife, spacers, and measuring tape for precise cuts and layout.
- Start installation along the longest wall or focal point to create a balanced, professional look.
- Maintain a ¼-inch expansion gap around the perimeter to accommodate flooring movement.
- Finish with baseboards or molding to cover gaps and give a polished, affordable upgrade appearance.

Laying luxury vinyl plank flooring can transform your space with its stylish look and durability. Whether you’re upgrading your living room or sprucing up your kitchen, choosing the right flooring types is essential for achieving the desired aesthetic and longevity. Luxury vinyl planks mimic the appearance of hardwood or stone, offering a high-end look without the hefty price tag. Before you start, gather the necessary installation tools—measuring tape, utility knife, spacers, a tapping block, a rubber mallet, and a straight edge—to guarantee a smooth process. Having the right tools makes the installation more efficient and helps you achieve professional results.
Transform your space with durable, stylish luxury vinyl planks that mimic hardwood or stone for a high-end look.
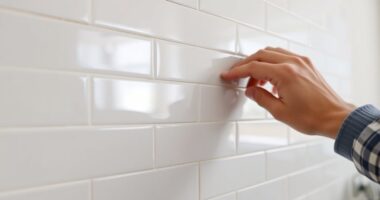
The first step is to prepare your subfloor. Make sure it’s clean, flat, and dry. Any debris or uneven spots can cause issues later, so take the time to sweep, vacuum, and fill any dips or cracks. Once the surface is ready, measure your space carefully. This helps you determine how many planks you’ll need and allows you to plan for cuts and layouts. When selecting flooring types, consider the wear layer thickness; thicker wear layers are better for high-traffic areas, providing extra durability and resistance to scratches or dents.
Start laying your planks along the longest wall or the most prominent feature of the room. Most luxury vinyl planks are designed with a click-lock system, making installation straightforward. To begin, leave a small expansion gap (about ¼ inch) along the perimeter to accommodate expansion and contraction. Use spacers to maintain consistent gaps and ensure your rows stay straight. When fitting planks together, connect the tongue and groove, then gently tap them into place with a tapping block and rubber mallet. This method guarantees a tight fit without damaging the edges.
As you progress, cut planks with a utility knife and a straight edge to fit around obstacles or at the end of rows. Measure carefully before making cuts to avoid waste and ensure a precise fit. For areas near doorways or irregular shapes, take precise measurements and trim accordingly. Remember, patience is key—double-check your work regularly to keep lines straight and gaps even. Additionally, considering acoustic properties can improve comfort and soundproofing in your space. Once all planks are installed, remove spacers and install baseboards or molding to cover the expansion gaps. This not only secures the floor but also gives it a finished look.

NAACOO Laminate/Vinyl Flooring Tools, Tapping Block for Vinyl Plank Flooring – Double Sided with Notches, Pull Bar, 40Pcs Floor Spacers, Rubber Mallet. Universal Floor Installation kit.
- Universal 4-in-1 Flooring Kit: Includes tapping block, pull bar, spacers, mallet
- Compatible with Most Flooring Types: Suitable for tongue & groove, click-lock, vinyl, laminate, hardwood
- Adjustable Edges for Different Floor Thicknesses: Three edges for 3.5mm to 12mm floors
As an affiliate, we earn on qualifying purchases.
As an affiliate, we earn on qualifying purchases.
Frequently Asked Questions
Can Luxury Vinyl Plank Flooring Be Installed Over Existing Flooring?
Yes, you can install luxury vinyl plank flooring over existing flooring if you prepare the surface properly. Start with thorough floor preparation, ensuring the current floor is clean, dry, and level. Check subfloor compatibility—luxury vinyl planks work best over smooth, stable surfaces like concrete or plywood. Avoid installing over uneven or damaged floors, as this can cause issues later. Proper preparation guarantees a seamless, long-lasting upgrade.
What Tools Are Essential for DIY Luxury Vinyl Plank Installation?
You’ll need a tools checklist to successfully install luxury vinyl plank flooring yourself. Essential tools include a tape measure, utility knife, spacers, a straightedge or T-square, a rubber mallet, and a tapping block. Don’t forget a saw for cuts and a level to guarantee proper placement. Follow installation tips like acclimating planks beforehand and leaving gaps for expansion. These tools make your DIY project smooth and professional-looking.
How Long Does Luxury Vinyl Plank Flooring Typically Last?
Your luxury vinyl plank flooring can last a decade or more if you care for it well, like a trusty old friend. Its floor lifespan hinges on durability factors such as quality, installation, and maintenance. Properly cared for, it resists scratches and moisture, ensuring it remains beautiful and functional. Regular cleaning and avoiding heavy impacts will extend its life, making your investment a lasting upgrade in your home.
Is Luxury Vinyl Plank Flooring Suitable for Bathrooms and Kitchens?
Yes, luxury vinyl plank flooring is suitable for bathrooms and kitchens. It handles bathroom moisture well and resists water damage, making it ideal for areas with high humidity. In kitchens, it withstands spills and splashes, and its waterproof core prevents warping. Just make certain you choose a waterproof LVP product and properly seal the edges to maintain its durability and keep your floors looking great.
What Are Common Mistakes to Avoid During Installation?
Think of your installation as laying a solid foundation for a masterpiece. Avoid rushing subfloor preparation—uneven surfaces are like cracks in a canvas. Guarantee proper adhesive application; too much causes mess, too little leads to gaps. Keep planks aligned, and don’t forget to leave space for expansion. These small steps prevent future headaches, transforming your space into a durable, stunning showcase that feels as good as it looks.
Conclusion
Installing luxury vinyl plank flooring is like giving your home a stylish new face without breaking the bank. With a little effort, you can transform your space into a sleek, modern haven. Just follow the steps carefully, and you’ll enjoy stunning results that look like high-end hardwood but cost a fraction. So go ahead, roll up your sleeves, and turn your vision into reality—building beautiful, affordable floors has never been easier.
![A Better Way To Tie Your Gym Shorts. (Or Any Drawstring) [Video]](https://getaninsight.com/wp-content/uploads/2026/07/a-better-way-to-tie-your-gym-shorts-or-any-drawstring-video-featured-380x200.jpg)


![Transitliberationism: A Bicycle Anarchist Manifesto [OC]](https://getaninsight.com/wp-content/uploads/2026/07/transitliberationism-a-bicycle-anarchist-manifesto-oc-featured-260x140.jpg)