To create a custom headboard for cheap, start by reupholstering your existing one. Measure it, pick an inexpensive fabric, and secure it tightly at the back. If you’re feeling adventurous, construct a new headboard using lightweight plywood or MDF, adding foam for comfort. Consider using colorful tapestries or salvaged architectural pieces for a unique twist. You can also incorporate built-in storage for added functionality. There are plenty more creative ideas to help you design the perfect headboard.
Key Takeaways
- Measure your bed size and use lightweight plywood or MDF as the base for a sturdy, custom headboard.
- Choose inexpensive fabrics like duvet covers or tapestries to cover your headboard creatively.
- Utilize foam or repurpose stuffing for comfort while securing the upholstery with staples or spray glue.
- Incorporate built-in storage solutions within the headboard design to enhance functionality and organization.
- Add personal touches with painted designs, salvaged materials, or decorative trims to reflect your style.
Reupholster Your Existing Headboard
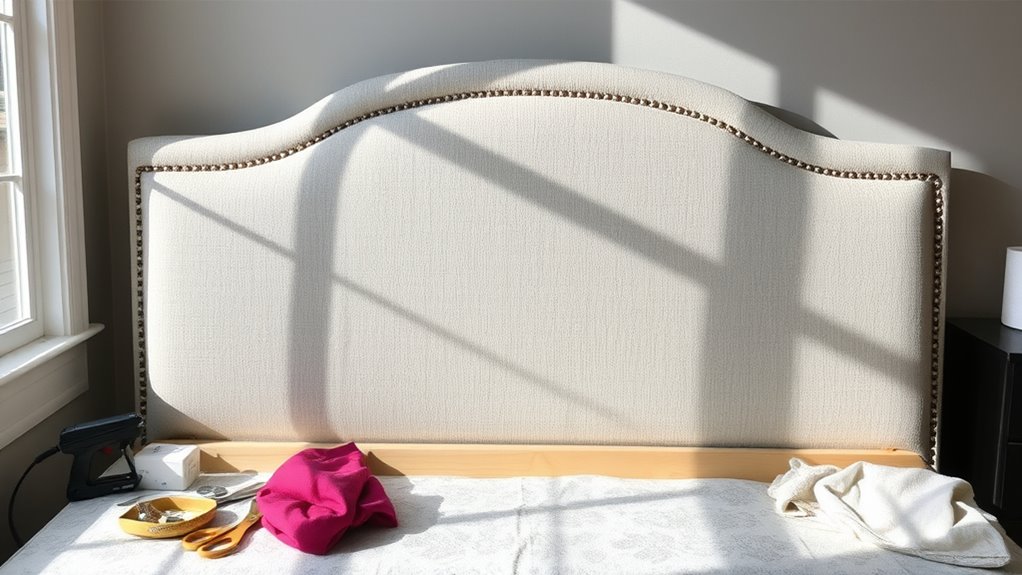
If you want to give your bedroom a fresh look without spending a fortune, reupholstering your existing headboard is a fantastic option.
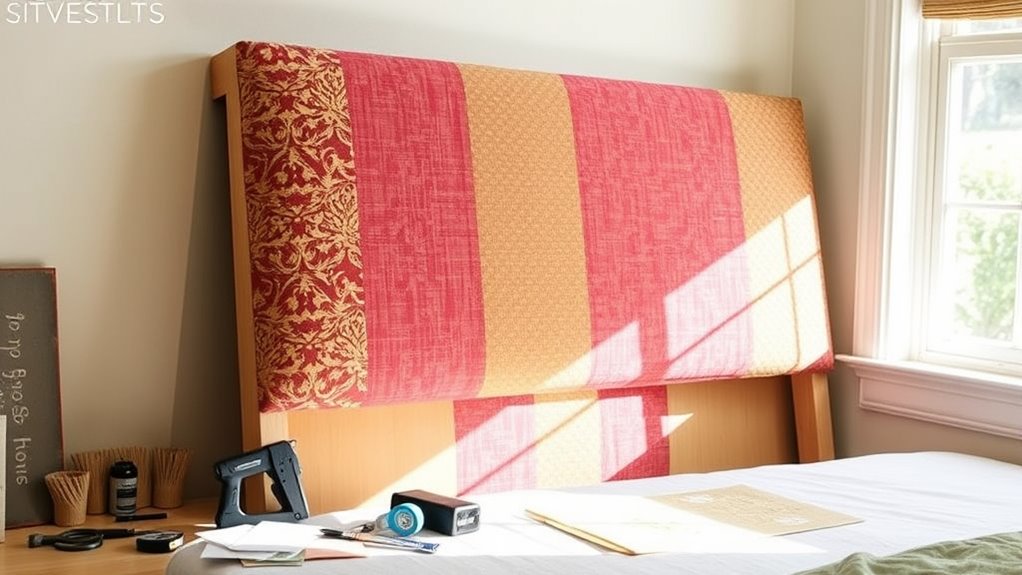
Start by measuring your headboard carefully, then choose an inexpensive fabric, like a duvet cover, that matches your style. Cut the fabric to size, ensuring it wraps around the headboard completely.
Using a staple gun, secure the fabric at the back for a clean finish. If your headboard is positioned against a wall, think about reupholstering the sideboards as well to create a cohesive look.
This simple process eliminates the need for sewing, making it accessible for anyone. With a little effort, you’ll transform your space and enjoy a beautifully refreshed bedroom.
Create Your Own Panel Headboard
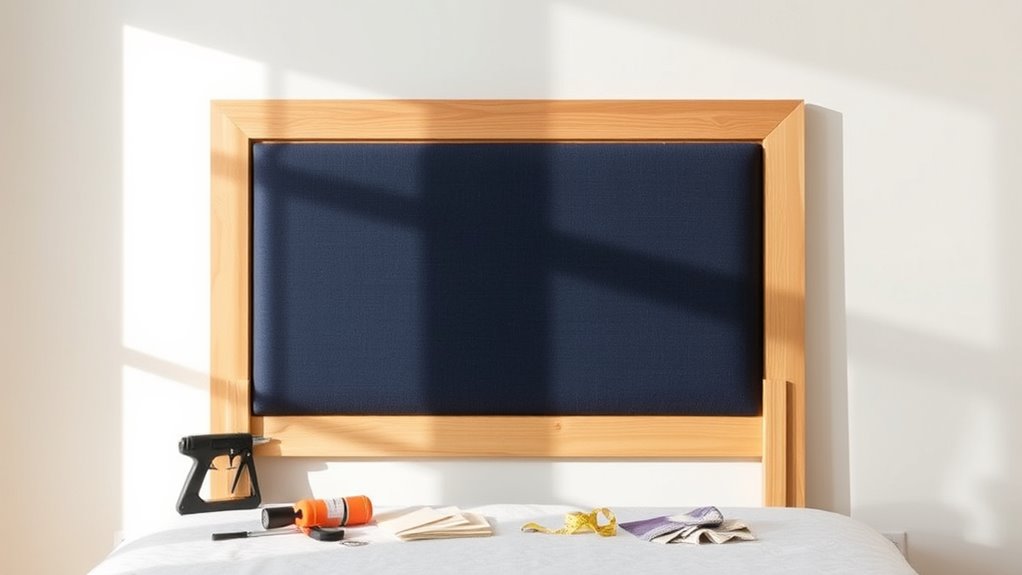
Creating your own panel headboard is a fun and budget-friendly project that requires just a few materials.
You’ll need lightweight plywood, foam or stuffing, fabric, and some basic tools for assembly.
Once you’ve gathered everything, you can easily follow the steps to assemble and install your custom headboard.
Materials Required for Panels
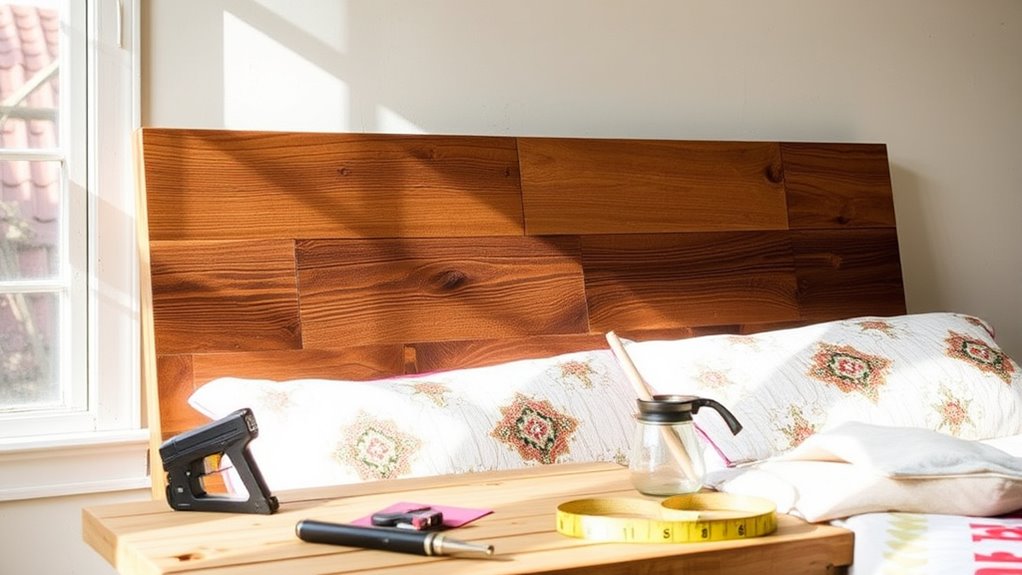
To craft your own custom panel headboard, you’ll need some essential materials to get started. First, gather six 21-inch squares of lightweight plywood cut to your desired size. This will form the base of your DIY padded headboard.
Next, acquire foam or repurposed stuffing to cover each plywood square, using spray glue for a secure attachment. Choose your upholstery fabric, guaranteeing it’s the right size to wrap each square tightly.
Staple the fabric from the center outwards for a clean finish. If you want a tufted headboard look, grab a button kit to add some flair.
Finally, verify your panels are stable by securing them to the wall using picture hooks or a French cleat system.
Assembly and Installation Steps
Once you’ve gathered all your materials, assembling your custom panel headboard becomes an exciting project.
Start by cutting six 21-inch squares of plywood to create uniform panels. Next, apply foam or repurposed stuffing to each panel using spray glue for added comfort.
Wrap the foam-covered panels with your chosen fabric, stapling from the center outward for a smooth finish. If you want extra flair, consider tufting with a button kit.
For installation, secure the panels to the wall using picture hooks or a French cleat system, ensuring they’re evenly spaced and aligned.
Finally, reinforce the edges with upholstery tacks or decorative trim to give your upholstered headboard a polished look. Incorporating vintage accessories can add a rustic charm that complements your DIY masterpiece.
Enjoy your DIY masterpiece!
DIY a Corner Headboard
If you’re looking to add a stylish touch to your bedroom without breaking the bank, a DIY corner headboard is a fantastic project.
Start by cutting two sheets of lightweight plywood to the width of your bed, measuring about 2 feet above the mattress for height. Wrap the plywood with batting or foam, using staples to secure the edges tightly for a smooth finish.
Next, choose a fabric that’s large enough to cover the boards, pulling it tight and securing it with more staples for a polished look.
Incorporating natural elements, such as wood finishes, can enhance the overall aesthetic of your headboard.
Finally, secure the finished headboard to the wall using screws or a french cleat system to prevent tipping. This way, your headboard will be both functional and visually appealing in your space.
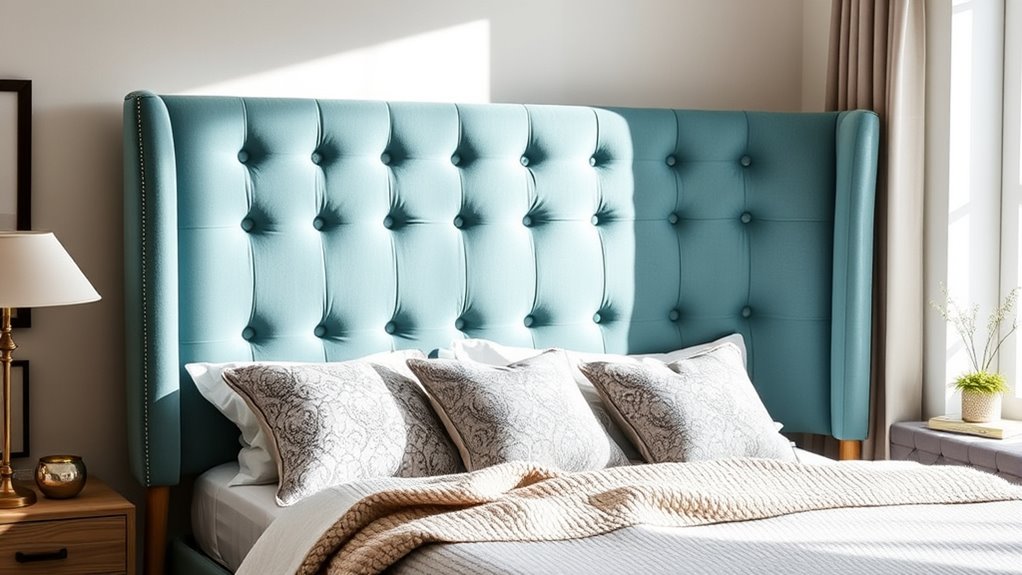
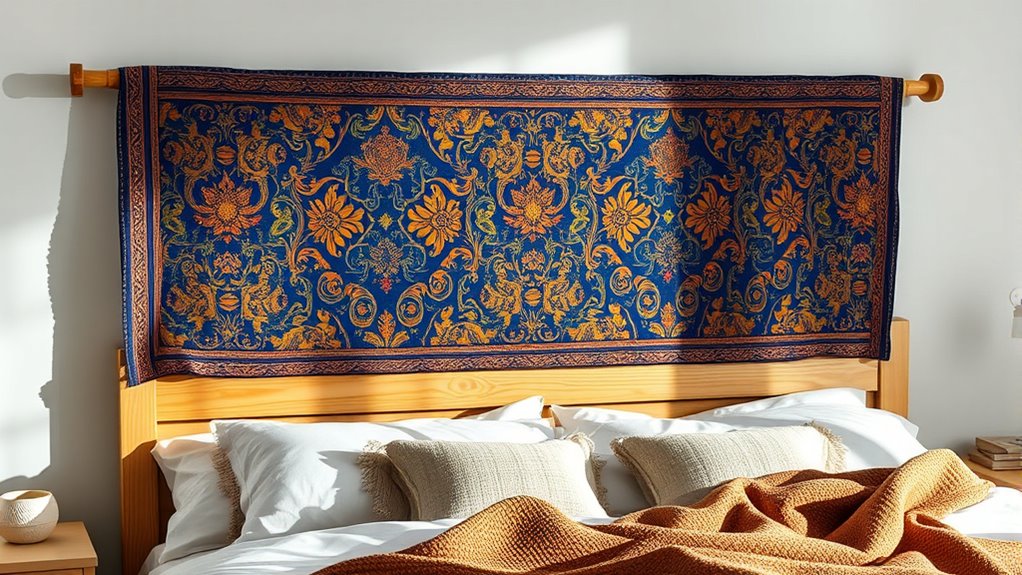
Tapestry and Fabric Headboards
When it comes to tapestry and fabric headboards, choosing the right fabric is key to making a statement in your bedroom.
You can easily hang it using curtain clips or a DIY rod, and don’t forget to customize with accessories like decorative trim or wall art for added flair.
This approach not only enhances your space but also keeps your budget in check.
Choosing Suitable Tapestry Fabric
How do you choose the perfect tapestry fabric for your headboard? Start by considering the weight and durability; heavier fabrics like jacquard or brocade offer a luxurious feel and long-lasting quality.
Next, think about the colors and patterns that will enhance your bedroom aesthetic—vibrant options can make your custom headboard a striking statement piece.
Finally, opt for stain-resistant materials to keep your headboard looking fresh over time. Additionally, energy-efficient designs in your overall decor can harmonize with your choice of fabric, promoting a cohesive and eco-friendly environment.
Here are three tips to help you select the right tapestry fabric:
- Verify the fabric is large enough, adding 10-15 cm on each side for wrapping.
- Mix and match textures for a personalized design.
- Choose easy-to-clean options for maintenance.
Easy Hanging Methods
Once you’ve chosen the perfect tapestry fabric for your headboard, the next step is to contemplate how to hang it effectively.
An easy DIY method involves draping the tapestry over a curtain rod or a DIY birch log rod, providing an eclectic look.
If you prefer fabric headboards, consider covering a large piece of plywood with foam and your chosen fabric. Use a staple gun to secure the fabric for a neat finish.
For a flexible hanging headboard, try using curtain clips or hook-and-loop tape to attach fabric panels. These lightweight materials make installation simple and allow you to change your design according to trends or personal style, turning your upholstery project into a fun and creative experience.
Customizing With Accessories
To truly personalize your headboard, consider accessorizing with unique elements that reflect your style. Tapestry and fabric headboards aren’t only affordable DIY projects but also allow for great customization.
Here are three ideas to enhance your bed headboard:
- Tapestry: Drape a colorful tapestry over a curtain rod for a vibrant, eclectic look that can change with the seasons.
- Fabric Panels: Stretch upholstery fabric over a padded headboard for a soft backdrop, customized with various textures and patterns.
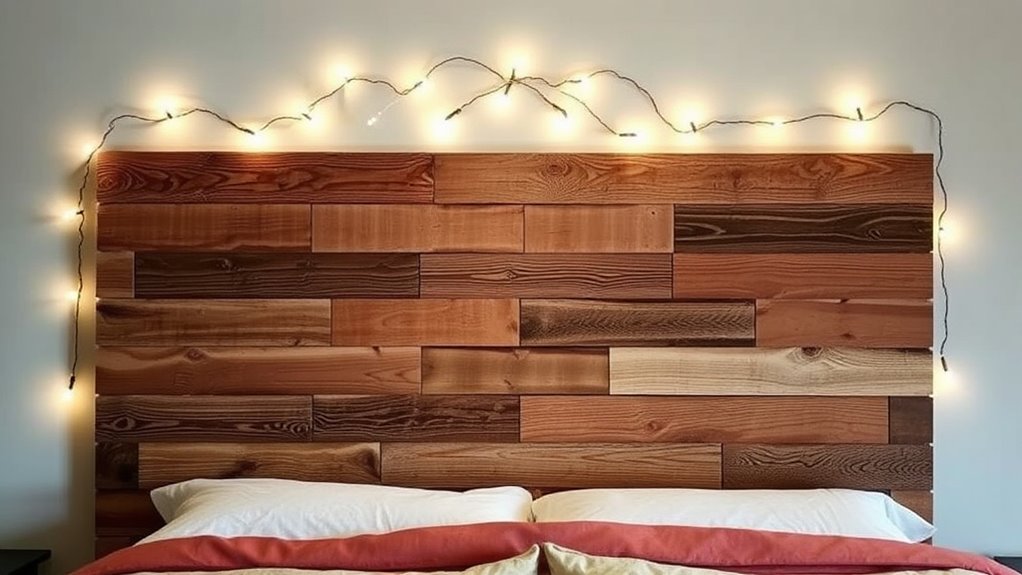
- Decorative Accents: Add fairy lights or framed art to your headboard to create a stunning statement piece.
Both options are lightweight and easy to install, perfect for renters or anyone wanting to refresh their bedroom style without permanent changes. Additionally, incorporating elements that align with sustainable fashion can enhance the eco-friendliness of your decor.
Creative and Artistic Headboards
While you might think a headboard has to be a standard piece of furniture, creative and artistic headboards can transform your bedroom into a unique expression of your style.
Start with canvas stretchers for personalized designs; you can paint them or cover them with fabric to match your decor. Consider DIY embroidered headboards by weaving cotton sash cord through drilled holes in plywood for a textured look.
For a personal touch, hand-draw designs on fabric-covered frames using permanent markers. If you want a 3D effect, paintable wall tiles can create a playful, Lego-inspired headboard.
Finally, salvage architectural elements like shutters or moldings to showcase vintage finds that add character and history to your space.
Functional Headboards
- Pegboards: Incorporate a pegboard to secure hooks for hanging decor, personal items, or even lights.
- Repurposed Doors: Use reclaimed paneled doors as headboards, giving you stylish storage behind them for books and decor.
- Built-in Shelves: Design a headboard with built-in storage compartments for easy access to bedside essentials while minimizing clutter. This approach not only enhances organization but also supports emotional well-being by creating a serene and inviting atmosphere in your bedroom.
Tips for Building a DIY Headboard
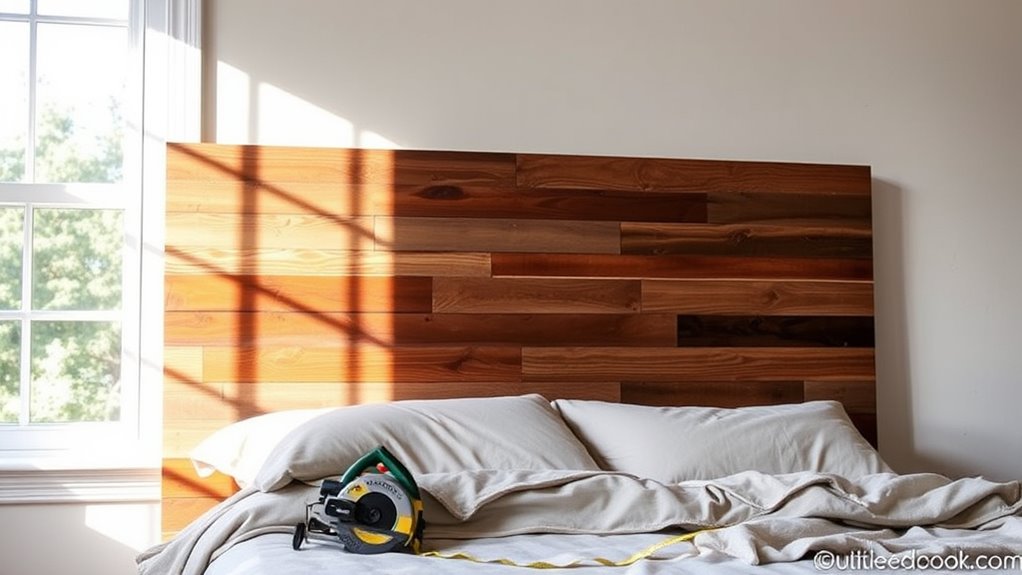
Building your own headboard can be a rewarding project that enhances your bedroom’s style without breaking the bank. Start by determining the size based on your bed type; a queen headboard typically measures around 62 inches wide.
Use lightweight plywood for the base to prevent bowing, and consider MDF for added stability. For comfort, opt for foam or repurposed stuffing at least 5cm thick, securing it with staples or spray glue.
When upholstering, follow these tips to assist: begin stapling fabric from the center top to guarantee even tension, and use a folding technique for neat corners. Additionally, incorporating natural elements into your design can promote tranquility and enhance the overall ambiance of your space.
Don’t forget to personalize your DIY headboard with unique design elements like tufting or a painted pattern, keeping costs under $100.
Frequently Asked Questions
Is It Cheaper to Make Your Own Headboard?
Yes, it’s definitely cheaper to make your own headboard. By using repurposed materials like pallets or thrifted fabric, you can cut costs greatly.
You might find that DIY projects can range from $26.99 to about $170, depending on what you choose. Plus, if you’ve got scraps lying around the house, you can save even more.
How to Create a Fake Headboard?
To create a fake headboard, you can hang a large piece of fabric or a tapestry above your bed. This instantly adds style without the commitment of a traditional headboard.
You might also use a curtain rod to drape lightweight fabric, allowing for easy updates.
Alternatively, consider cutting plywood, covering it with foam and fabric, then leaning it against the wall for a chic, padded look that feels cozy and inviting.
What Is the Best Material for Homemade Headboards?
When it comes to homemade headboards, you’ll discover that plywood and MDF are your best friends!
They’re lightweight and easy to cut, making your DIY dreams a breeze. If you want comfort, throw in some foam padding—think clouds for your head!
And don’t forget fabric; you can go from chic cotton to opulent velvet.
Reclaimed materials can add personality too, turning your headboard into a one-of-a-kind masterpiece.
Get creative and make it yours!
What Is a Floating Headboard?
A floating headboard‘s a stylish, modern option that mounts directly to your wall, giving the illusion of it hovering above your bed.
You’ll love how it enhances your room’s aesthetic while saving floor space, making it ideal for smaller areas.
Made from materials like wood or upholstered fabric, it can match your decor perfectly.
Plus, it’s easier to clean since there are no legs or frames collecting dust underneath.
Conclusion
With a little creativity and effort, you can easily craft a stunning headboard without breaking the bank. Whether you choose to reupholster, build from scratch, or get artistic with fabric, the options are endless. Isn’t it exciting to think about how a custom headboard can transform your bedroom? So gather your materials and let your imagination run wild—you’re just a few simple steps away from a personalized touch that reflects your unique style!