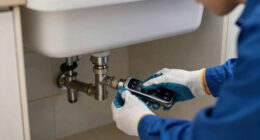
Many people overcomplicate under-sink reverse osmosis installations by skipping clear instructions or rushing the process. In reality, staying organized, following each step carefully, and using the provided tools makes it straightforward. Be sure to double-check all connections and avoid common mistakes like leaks or improper fittings. By following a simple, step-by-step approach, you’ll set up your system confidently—keep going to discover how to make the installation smooth and hassle-free.
Key Takeaways
- Follow manufacturer instructions carefully to avoid common installation errors and ensure system functionality.
- Properly seal all connections and fittings to prevent leaks and water damage.
- Use correct fittings and tools specified for your system model during setup.
- Securely mount the system bracket and ensure the drain saddle is correctly installed.
- Verify system performance before completing installation by checking for leaks and proper water flow.

iSpring RCC7AK, NSF Certified, 75 GPD, Alkaline 6-Stage Reverse Osmosis System, pH+ Remineralization RO Water Filter System Under Sink, Patented Top-Mounted Faucet Design for Easy Installation
PATENTED DESIGN – The top-mounted fastener allows for easy countertop installation entirely from above, eliminating the hassle of…
As an affiliate, we earn on qualifying purchases.
As an affiliate, we earn on qualifying purchases.
Why Choose an Under-Sink Reverse Osmosis System?
An under-sink reverse osmosis system is an excellent choice because it provides clean, great-tasting water directly from your tap without taking up much space. You’ll notice a clear improvement in water quality, as the system effectively removes contaminants, chemicals, and impurities that affect taste and safety. Plus, it’s cost-efficient in the long run. Instead of buying bottled water or relying on expensive filters, you get pure water right at home for a fraction of the cost. The system’s efficiency means you save money and reduce plastic waste. Its compact design fits neatly under your sink, making it perfect for maintaining a clutter-free kitchen. Additionally, understanding the importance of water filtration can help you appreciate how these systems enhance your health and safety. Recognizing the benefits of water purification can motivate you to choose the right system for your needs. Considering indoor air quality alongside water quality can lead to a healthier home environment overall. Moreover, selecting a system with high-quality components ensures durability and reliable performance over time. Overall, this setup offers a reliable, economical way to enjoy high-quality drinking water every day.

APEC Water Systems ICEMAKER-KIT-38-14-RO Ice Maker Kit for Reverse Osmosis System with Upgraded 3/8" Output (RO-Hi Model), Refrigerator & Water Filters
Connects APEC Reverse Osmosis System model RO-Hi and compatible RO systems with 3/8" OUTPUT to refrigerator ice makers…
As an affiliate, we earn on qualifying purchases.
As an affiliate, we earn on qualifying purchases.
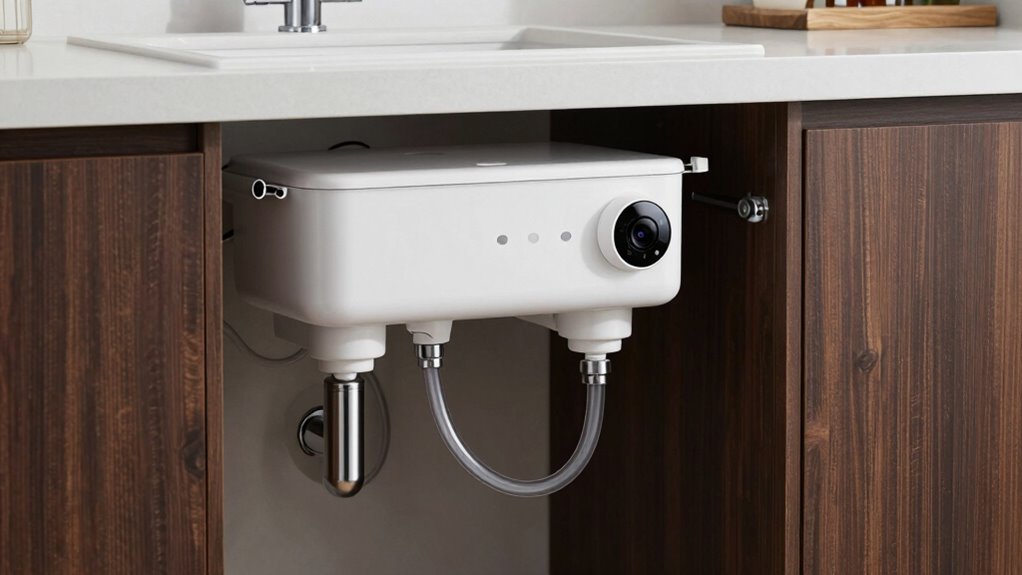
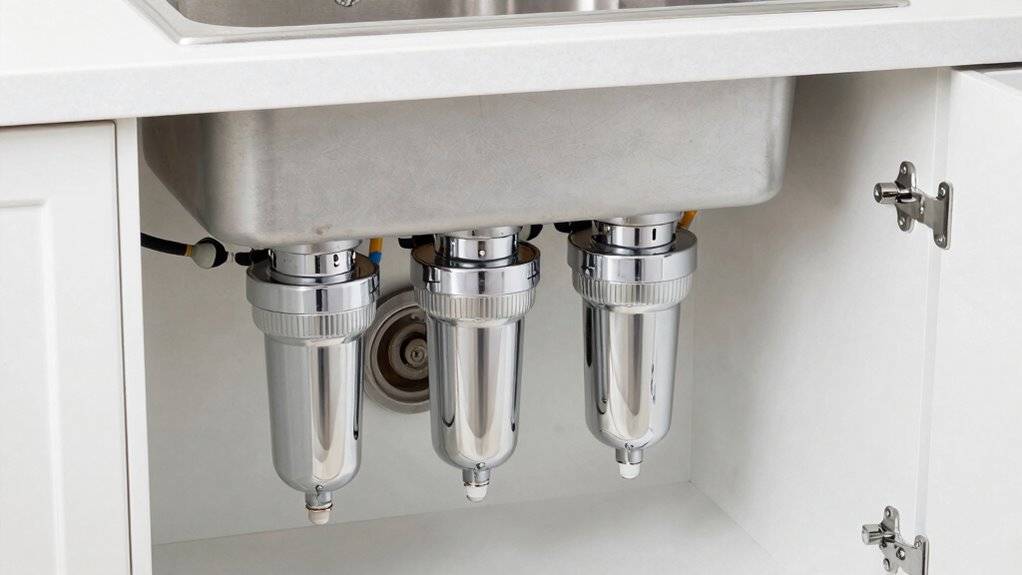
How Do Under-Sink RO Systems Work?
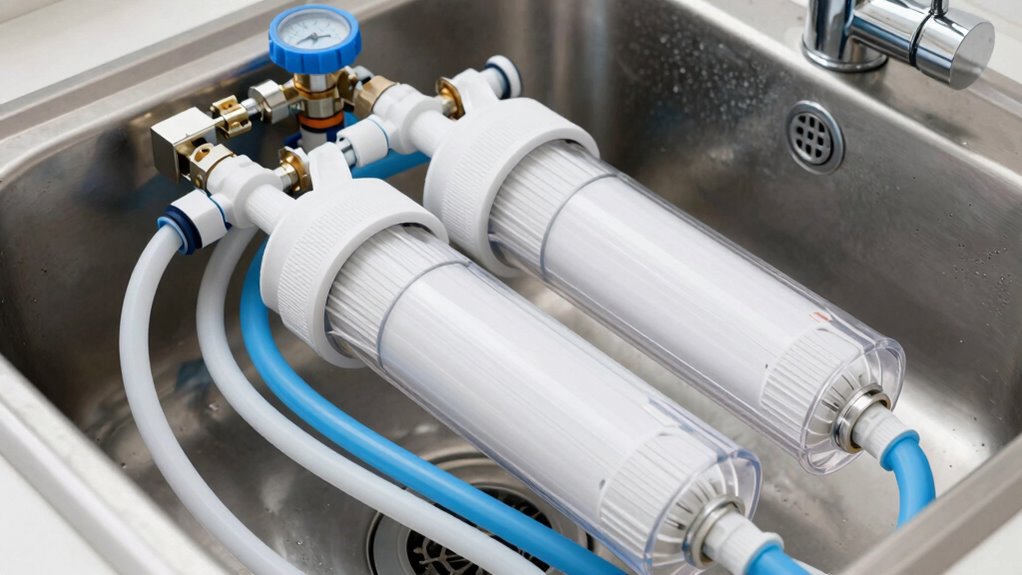
Under-sink reverse osmosis systems work by forcing tap water through multiple filtration stages to remove contaminants. The filtration process begins with a sediment filter that traps dirt and particles, protecting the system components. Next, a carbon filter reduces chlorine and improves taste and odor. Water then passes through the semi-permeable membrane, where most dissolved impurities, such as heavy metals and salts, are removed. The system components include the filters, membrane, storage tank, and a faucet for dispensing purified water. When you turn on the tap, water flows through these stages, gradually becoming cleaner. This process is efficient and thorough, ensuring that you get safe, fresh-tasting water directly from your sink. Proper maintenance and understanding of filtration stages help ensure the system operates effectively over time. Additionally, regular system checks can prevent potential malfunctions and extend the lifespan of your RO system. Understanding system components and their roles can also help troubleshoot common issues more effectively. Regular monitoring of system performance can help identify when filter replacements are needed to maintain optimal function. Incorporating proper installation techniques can further enhance the system’s effectiveness and longevity.
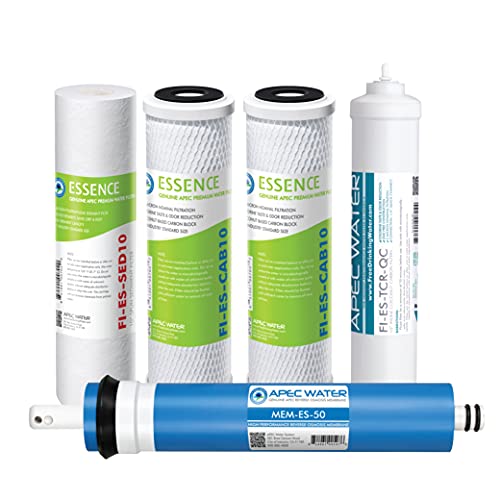
APEC Water Reverse Osmosis Filter Replacement Set, 5-Stage RO System Filters, 50 GPD, For Essence Series ROES-50 Under Sink System
APEC Water ESSENCE Series FILTER-MAX-ES50 is for ROES-50.
As an affiliate, we earn on qualifying purchases.
As an affiliate, we earn on qualifying purchases.
Common Mistakes to Avoid During Installation
Installing a reverse osmosis system incorrectly can compromise its performance and lead to costly repairs. Common installation pitfalls include ignoring manufacturer instructions, rushing the process, or misconnecting components. To avoid these issues, watch out for:
Proper installation is key to preventing costly repairs and ensuring optimal reverse osmosis system performance.
- Forgetting to check for proper water pressure before installation.
- Skipping or improperly sealing filters and connections, which can cause leaks.
- Using incorrect fittings or ignoring component instructions, leading to component errors.
- Failing to install the drain saddle securely, risking water damage.
- Not verifying the system’s performance standards prior to final setup, which can result in inefficiency or damage. Additionally, ensuring all installation steps are followed precisely helps prevent issues that could compromise the system’s longevity. Properly understanding regional water quality can also influence the setup process and component choices. Being aware of water chemistry can help you select the appropriate filters and membranes for optimal operation.
These errors can reduce system efficiency or damage parts. Always follow instructions closely, double-check connections, and ensure fittings are tight. Avoiding these mistakes guarantees your system runs smoothly and lasts longer without costly repairs.

1/4", 3/8", or High Flow Leak Stop Valve, Automatic Water Shut Off Valve, Leak Detector, Leak Protection for Reverse Osmosis to Full Flow Under Sink Water Filters (1/4" 1-Pack)
PROTECT YOUR HOME OR OFFICE: Automatically shut the water off to your system in the event of a…
As an affiliate, we earn on qualifying purchases.
As an affiliate, we earn on qualifying purchases.
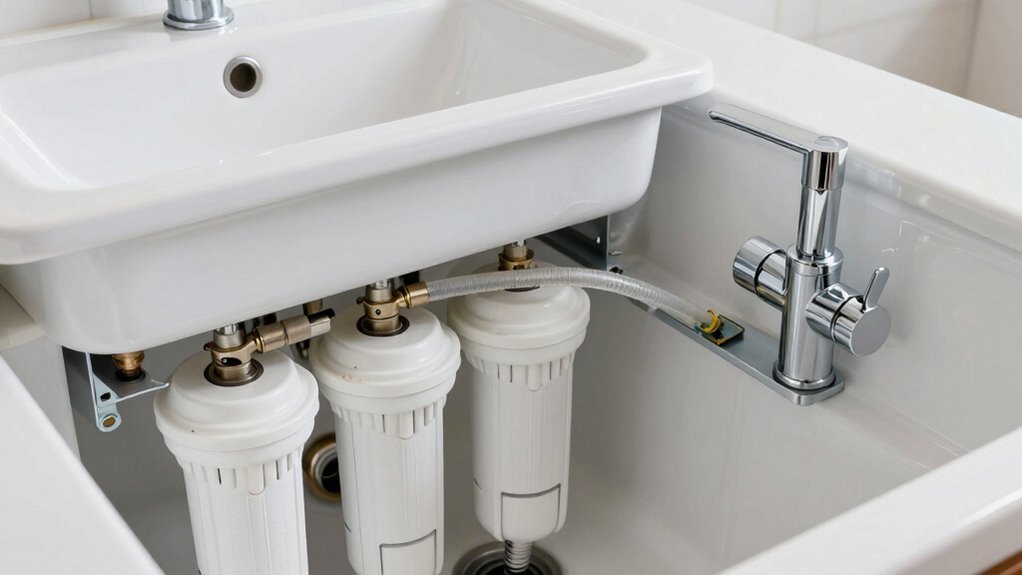
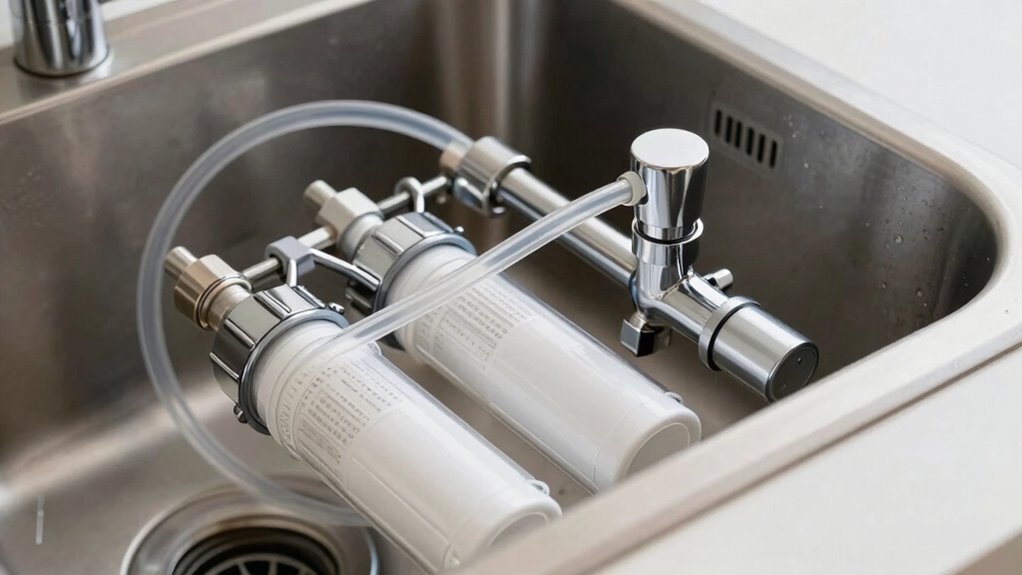
How to Install Your Under-Sink RO System Step-by-Step
Beginning your under-sink reverse osmosis system involves gathering all necessary tools and parts, then carefully following each step to guarantee proper setup. Start by selecting the right filters for your system; filter selection impacts water quality and system longevity. Use installation tools like a drill, adjustable wrench, and tubing cutter to connect components securely. Begin by shutting off the water supply and mounting the system bracket under the sink. Install the sediment and carbon filters in their designated housings, ensuring they are tight but not over-tightened. Connect the tubing from the faucet to the system, then link the system to the cold water line. Double-check all connections for leaks before turning the water back on. It’s also helpful to consult the manufacturer’s instructions during installation to avoid common mistakes. Understanding the water filtration process can help you troubleshoot issues more effectively. Additionally, inspecting your system components regularly can prevent unexpected failures. Proper system maintenance and regular filter changes are essential to ensure peak performance and water quality. Regularly verifying the filter replacement schedule ensures your system continues to operate efficiently. Following these steps precisely ensures a smooth installation process with peak performance.
Troubleshooting and Maintaining Your RO System
Regular maintenance and prompt troubleshooting help guarantee your reverse osmosis system continues to deliver clean, great-tasting water. To keep water quality high and extend filter lifespan, check these key areas:
Regular maintenance and troubleshooting ensure your reverse osmosis system provides clean, great-tasting water.
- Replace filters regularly—usually every 6-12 months—to prevent buildup that impacts water quality. Proper filter replacement is essential for maintaining content quality and topical authority.
- Inspect the membranes for signs of clogging or damage, and replace if needed.
- Monitor water flow rates; a decline can indicate clogged filters or other issues. Understanding system performance metrics can help you identify problems early.
- Sanitize the system periodically to prevent bacterial growth and maintain excellent performance.
- Understanding time-related factors in your system can help you anticipate when to perform these maintenance tasks efficiently. Additionally, keeping an eye on system longevity can help you plan for replacements before issues arise.
Frequently Asked Questions
Can I Install an Under-Sink RO System Without Plumbing Experience?
Yes, you can install an under-sink RO system without plumbing experience, but it’s important to have some DIY installation skills. You’ll need basic plumbing knowledge to connect the system properly, like attaching the faucet and water supply line. Follow clear instructions step-by-step, and consider watching tutorial videos. If you feel unsure, consulting a professional guarantees a safe, leak-free setup, but many find it manageable with patience and careful attention.
How Often Should I Replace the RO Membrane?
You should replace the RO membrane every 2 to 3 years, following the maintenance schedule recommended by the manufacturer. The replacement frequency depends on your water quality and usage. Keep an eye on water flow rate and taste; if you notice a decline, it’s time to change the membrane. Regular maintenance guarantees your system functions efficiently and extends its lifespan, so don’t skip those scheduled replacements.
Is a Booster Pump Necessary for My System?
Think of your RO system as a thirsty plant needing just the right water pressure. A booster pump isn’t always necessary, but it can be a crucial helper if your home’s pressure drops below 40 psi. It ensures ideal pump necessity and maintains consistent pressure considerations. Without it, your system might struggle to produce quality water, so assess your home’s pressure first before deciding if a booster pump will help your under-sink setup thrive.
What’s the Estimated Lifespan of an Under-Sink RO Unit?
Your under-sink RO unit typically lasts 2 to 3 years, but water filtration and system maintenance play key roles in its lifespan. Regularly replacing filters and checking for leaks helps guarantee it functions efficiently. If you notice reduced water quality or flow, it’s time for maintenance or parts replacement. Proper care extends the system’s life, saving you money and keeping your water clean and safe.
Do Under-Sink Systems Remove Beneficial Minerals From Water?
You might think you’re losing the good stuff, but under-sink RO systems do remove some beneficial minerals, which can impact your health if your diet isn’t balanced. Think of it as taking the good with the bad; mineral retention isn’t perfect. While it’s a concern, you can add mineral drops or use mineral-rich water post-filtration to keep your water healthy and tasty. Balance is key to true health impacts.
Conclusion
Installing an under-sink reverse osmosis system isn’t as complicated as it seems—think of it as opening a door to cleaner, fresher water. With a little patience and attention, you’ll turn what feels like a tangled mess into a smooth-flowing oasis. Don’t let the fear of mistakes hold you back; your effort will be the key to access pure, invigorating water right at home. Jump in, and enjoy the clear, crisp results waiting just beneath your sink.