
To weatherstrip doors and windows, start by identifying air leaks using a candle or incense stick around frames. Measure the perimeter of your doors and windows, then cut the appropriate weatherstripping material like foam tape, rubber, or vinyl to size. Apply the strips along door frames and sash edges for a tight seal, and consider sealant or caulking for larger gaps. Keep an eye on your weatherstripping now and then to maintain your home’s comfort and efficiency. If you continue, you’ll find helpful tips to maximize your sealing efforts.
Key Takeaways
- Measure door and window perimeters accurately before choosing and cutting weatherstripping materials.
- Select suitable weatherstripping types, such as foam tape, V-strip, or rubber, based on the specific application.
- Clean and dry surfaces thoroughly before applying adhesive-backed weatherstripping for optimal adhesion.
- Install weatherstripping along frames or sash edges to create a tight seal without hindering operation.
- Regularly inspect and replace worn or damaged weatherstripping to maintain energy efficiency and indoor comfort.

Weatherstripping doors and windows is one of the simplest and most cost-effective ways to improve your home’s energy efficiency. When you focus on draft sealing, you’re preventing unwanted air from sneaking in or escaping, which can substantially cut down on heating and cooling costs. Draft proofing is all about creating a tighter seal around your doors and windows, ensuring your indoor climate stays consistent and comfortable. By sealing these gaps, you’re not just saving money—you’re also reducing the strain on your HVAC system and making your home more environmentally friendly.
Sealing gaps around doors and windows boosts energy efficiency and reduces heating and cooling costs naturally.
To start, identify where drafts are entering your home. On doors, check for gaps around the edges when the door is closed. For windows, look for drafts around the frame or feel for cold air during colder months. You can use a simple candle or a lit incense stick to detect air leaks—if the flame flickers or the smoke wavers, you’ve found a draft. Once you’ve pinpointed these areas, you can begin draft sealing with appropriate weatherstripping materials.
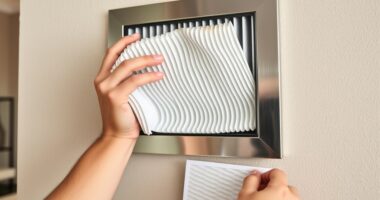
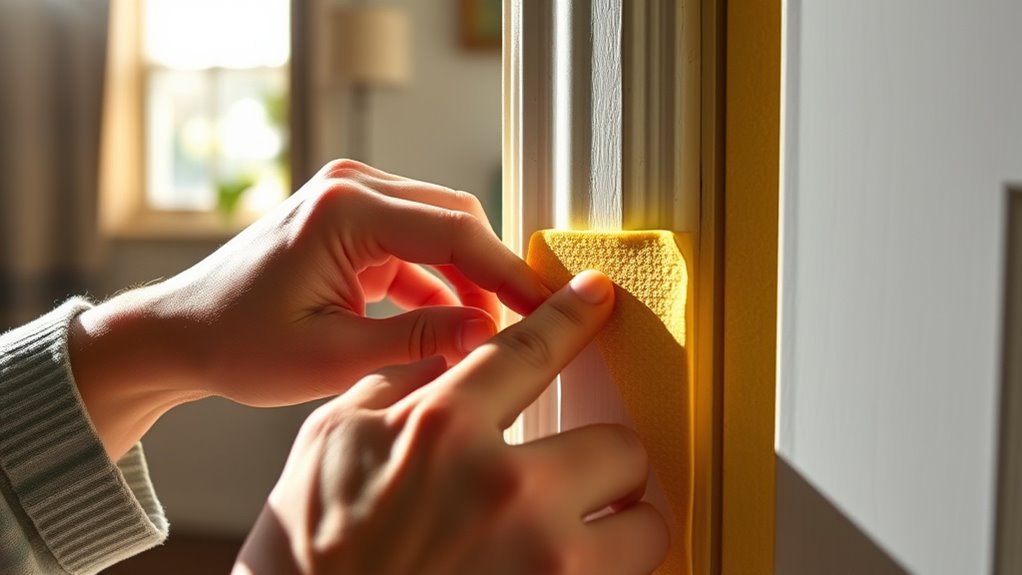
Installing weatherstripping is straightforward. For doors, you can choose adhesive-backed foam tape, rubber, or vinyl weatherstripping that compresses when the door is shut. Measure the perimeter of your door frame carefully, then cut the weatherstripping to size. Apply the tape or stick the strips along the door frame, ensuring a tight fit without obstructing the door’s operation. For windows, similar methods work—adhesive foam or V-strip weatherstripping can be applied along the sash or frame edges. Some windows might benefit from a weatherproof sealant or caulking for permanent draft proofing, especially if gaps are larger. Regular maintenance enhances the effectiveness of draft sealing, as wear and tear can compromise the seal over time. Over time, weatherstripping can wear out or become dislodged, reducing its ability to block drafts. Inspect it at least once a year, especially before winter and summer, and replace any damaged strips. Additionally, consider installing door sweeps on exterior doors to block drafts from below. These are easy to attach and can make a noticeable difference in preventing cold air infiltration.
Frequently Asked Questions
What Tools Are Needed for Weatherstripping?
When you’re looking to weatherstrip doors and windows, you’ll need common tools like a utility knife, screwdriver, and measuring tape. The types of weatherstripping vary, including foam tape, V-strip, and door sweeps. You might also need scissors for cutting, a caulking gun for sealing gaps, and a pencil to mark measurements. These tools help guarantee precise application, making your home more energy-efficient and comfortable.
How Often Should I Replace Weatherstripping?
They say, “A stitch in time saves nine,” and that’s true for weatherstripping. You should check for signs of wear every season and follow a regular maintenance schedule. Replace weatherstripping when it becomes cracked, brittle, or no longer seals properly. Doing so keeps drafts out, saves energy, and prevents more costly repairs. Staying attentive guarantees your home stays comfortable and efficient year-round.
Can Weatherstripping Be Used on Uneven Surfaces?
When sealing uneven surfaces, you can adapt your weatherstripping by choosing options designed for uneven surface adaptation. Flexible or foam weatherstripping works well because it conforms to irregularities, providing a better seal. If your surface is too uneven, consider alternative sealing methods like caulking or sealant strips, which can fill gaps more effectively. These methods guarantee your door or window remains energy-efficient and protected from drafts.
Is There a Difference Between Foam and Rubber Weatherstripping?
Think of foam and rubber weatherstripping as the chameleon’s choice for sealing. Foam offers flexible, easy installation with various types of sealants, perfect for irregular surfaces. Rubber provides durability and a tight seal, ideal for high-traffic areas. Your goal is a snug fit, so consider installation techniques suited for each material. Choosing the right type depends on surface unevenness and your need for longevity in weatherproofing.
How Do I Choose the Right Weatherstripping for My Door or Window?
When choosing weatherstripping, you should consider material options like foam, rubber, or vinyl based on your door or window’s needs. Think about durability, flexibility, and weather resistance. For installation tips, measure carefully, clean the surface well, and guarantee a snug fit without pinching or gaps. Pick a material that suits your climate and door type, making installation easier and ensuring a tight seal for better energy efficiency.
Conclusion
Now that you’ve learned how to weatherstrip your doors and windows, imagine the difference it’ll make—warm air stays in, cold air stays out. But here’s the twist: a tiny gap can undo all your hard work, letting drafts sneak in just when you least expect it. Keep an eye out for those sneaky leaks, and your home will stay cozy and energy-efficient all season long. The secret’s in the details—are you ready to seal the deal?