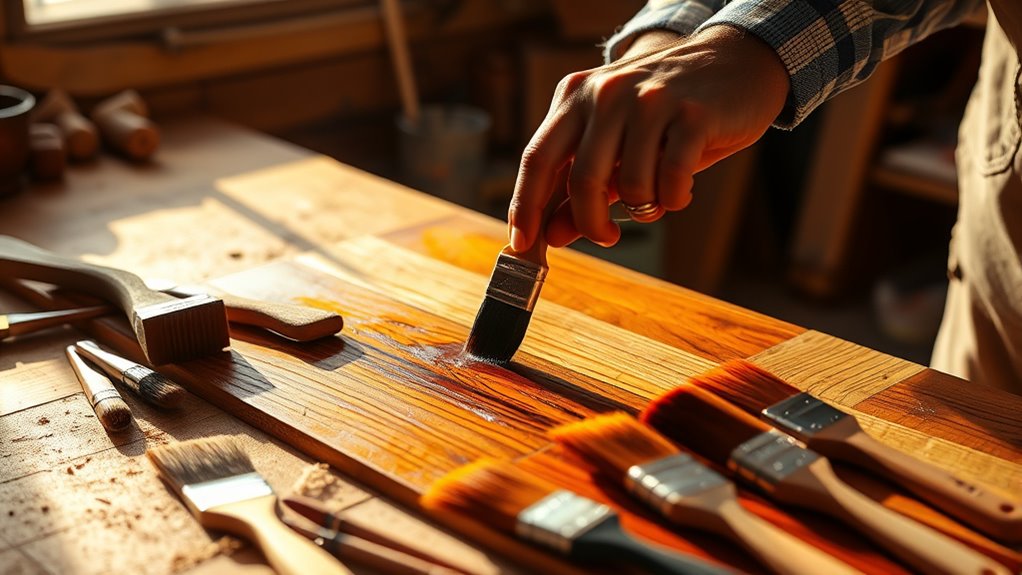

To stain wood like a boss, start with thorough preparation. Sand your surface using 120, 180, and 220-grit sandpaper to ensure a smooth finish. If you’re working with soft or porous woods, apply a wood conditioner for even color absorption. Choose the right stain based on the wood type, then use a natural bristle brush to apply it along the grain. After allowing it to penetrate, wipe off excess stain and let it dry completely. Want to elevate your skills even further?
Key Takeaways
- Start by thoroughly sanding your wood with 120, 180, and 220-grit sandpaper for a smooth surface and to avoid blotchiness.
- Apply a wood conditioner for soft or porous woods to ensure even stain absorption and a uniform finish.
- Choose the appropriate stain type: oil-based for hardwoods like oak, and water-based for softwoods like pine for quicker drying.
- Use a natural bristle brush and apply stain in the direction of the grain, allowing it to penetrate for 5 to 15 minutes before wiping off excess.
- Finish with a thin coat of polyurethane, sanding lightly between coats for a professional, silky smooth appearance.
When you want to stain wood like a boss, proper preparation is key. Start by grabbing your scrap piece of wood to test your techniques and stain options. You’ll want to sand the surface using 120, 180, and then 220-grit sandpaper. This multi-step sanding process ensures a smooth surface and helps prevent blotchiness in your final stained piece. Skipping this step is a rookie mistake that can ruin your project.
Next, if you’re working with soft or porous woods, you should definitely apply a wood conditioner. It’s crucial for promoting even absorption, which minimizes color distribution issues that can arise during the staining process. Once the conditioner is applied, give it some time to sink in before you move on.
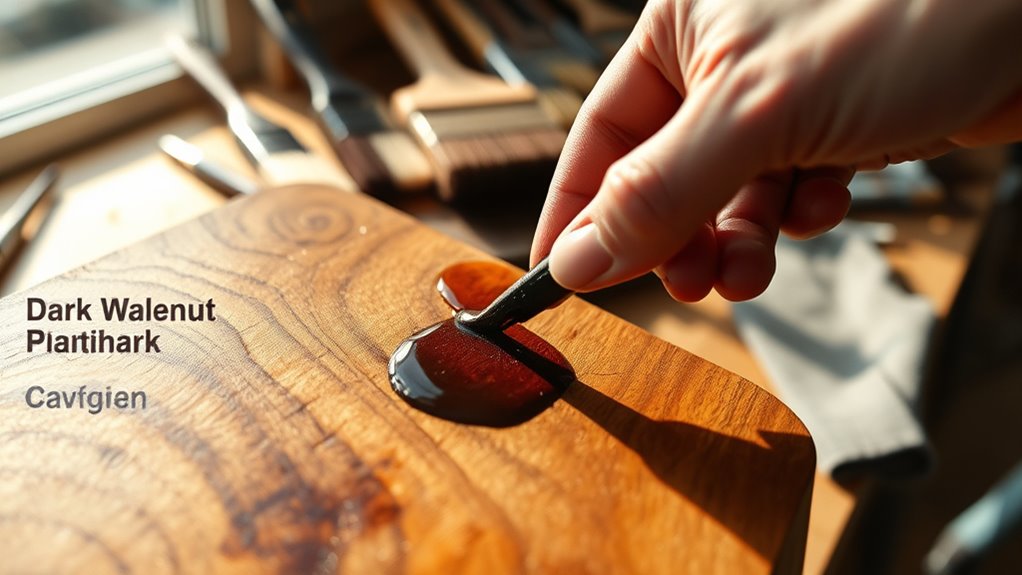
Now it’s time to choose your stain. If you’re working with hardwoods like oak, an oil-based stain is your best bet since it enhances the natural grain beautifully. On the other hand, if you’re using softwoods like pine, a water-based stain will dry quickly and still give you a nice finish.
Now, let’s get to the fun part: applying your stain. Use a natural bristle brush for a smooth application. Remember to always follow the direction of the grain to avoid unsightly streaks. Allow the stain to penetrate for about 5 to 15 minutes. This waiting period is critical for achieving the desired color intensity. After that, wipe off the excess stain to prevent any pooling, which can lead to an uneven finish.
Once your stain has been applied, let it dry completely before moving on. This step is crucial for achieving a professional look. After the stain is dry, it’s time to enhance the appearance with a thin coat of polyurethane. Apply it carefully, ensuring you sand lightly between coats for that silky smooth finish. Interior designers recommend this step for any project that aims for a polished look.
Finally, always allow adequate drying time for your top coat. This not only protects the wood but also elevates its overall aesthetic. With patience and attention to detail, you’ll stain wood like a boss, leaving everyone impressed with your craftsmanship.
Frequently Asked Questions
What Is the Most Efficient Way to Stain Wood?
To efficiently stain wood, start by sanding the surface with progressively finer grit sandpaper, ensuring it’s smooth and free of imperfections.
If you’re using soft or porous wood, apply a pre-stain conditioner to promote even absorption.
Choose the right stain type for the wood species, then apply it with a brush or rag in a circular motion.
Allow it to penetrate for a few minutes before wiping off excess.
Finally, let it dry thoroughly before applying a protective finish.
What Should You Not Do When Staining Wood?
When staining wood, don’t rush in like a whirlwind, leaving rough edges and blotchy spots behind. Instead, take your time.
Avoid skipping the sanding and pre-staining conditioner; they’re your allies in achieving a smooth, even finish.
Don’t stain in high humidity or cold; it’ll ruin your work.
And remember, never let excess stain linger too long on the surface. Wipe it off promptly for a flawless, polished look.
Will a Second Coat of Stain Even Out the Color?
Yes, a second coat of stain can even out the color. It enhances richness and depth, making the hue more vibrant.
However, you should let the first coat dry thoroughly before applying the second, usually about four hours. This prevents blotchiness and ensures proper adhesion.
Testing on a scrap piece first helps you see how the second coat will affect your project, especially if the wood absorbed the first coat unevenly.
How Do You Stain Wood to Look Like Barnwood?
To stain wood and achieve that barnwood look, start with rough-sawn pine or reclaimed wood for natural texture.
Apply a pre-stain wood conditioner to ensure even absorption, especially on porous surfaces.
Choose a darker oil-based stain like walnut or espresso to highlight the grain.
After staining, use a gray wash or light dry-brushing technique to mimic sun-bleached effects.
Finally, finish with a matte polyurethane to protect while keeping that rustic charm.
Conclusion
You’ve mastered the art of staining wood like a pro! With the right tools and techniques, you can transform any piece into a stunning work of art. Just remember, practice makes perfect, so don’t be afraid to roll up your sleeves and dive in. Soon enough, you’ll be the go-to person for all things wood stain—after all, it’s never too late to learn the ropes. Now, get out there and make your projects shine!